Introduction
WorkTick - Ultimate HRM & Project Management
WorkTick - It is an HRM management system with Project Management that captures all the essential functionalities required for any enterprise and more. It's the solution you need to manage your enterprise, employees and projects - all in one app.
- Very simple installation in 5 minutes
- Easy System and Dynamic dashboard
- 6 Months Support
Features
WorkTick Offers Lots of Awesome Features out of the box, such as :
- Easy System and Dynamic dashboard
- Company , Departments , Designations
- Attendance , Policy , Announcement
- Users , Employee , Client
- Projects , Tasks
- Currency , Settings , Backup
- Office Shift , Events , Holidays
- Awards , Complaints , Travels
- Accounting & Expense , Deposit
- Leave Request & Trainings
- Attendance & Employee reports
- Expense & Deposit reports
- Projects & Tasks reports
- Uses Structured And Customizable Code
- Dark Version Included
- Multilingual 14 languages and More Will be added soon
- RTL Support Adeed
- Clean And Organized Code
- Well Documented Code
- Standard Folder Stucture
- Easy System and Dynamic dashboard
- 6 Months Support
- And Many More Inside ...
Credits :)
Special Thanks To These Awesome Plugins That Helps Us to Build This Awesome System
View Change Log
Version 1.0 – 01-03-2022- Initial Release
Installation
you will need to make sure your server meets the following requirements:
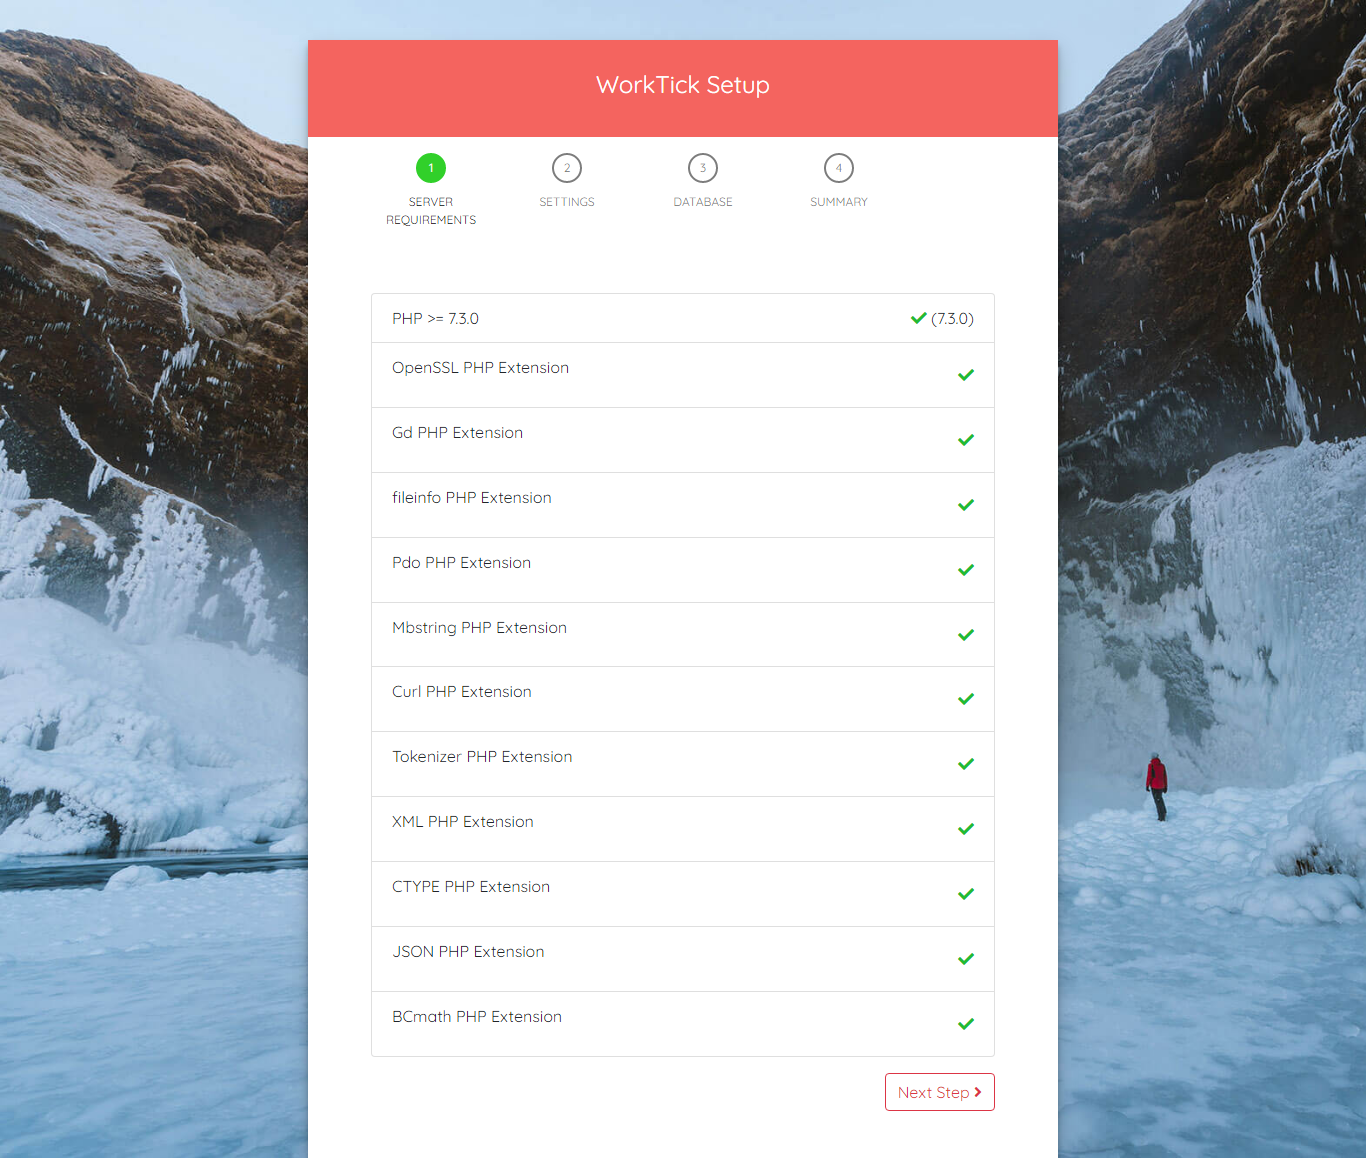
- PHP >= 7.3.0
- Mysql 5.x or higher
- mod_rewrite Apache
- BCMath PHP Extension
- Ctype PHP Extension
- Fileinfo PHP Extension
- GD2 PHP Extension
- JSON PHP Extension
- Mbstring PHP Extension
- OpenSSL PHP Extension
- PDO PHP Extension
- Tokenizer PHP Extension
- XML PHP Extension
- ZIP Extension (required for system updates)
Installation in Localhost
1) Installation With XAMPP
=> Install Xampp via Install Xampp
Step 1 : Extract the worktick.zip to C:/xampp/htdocs/
Step 2 : Go to C:\Windows\system32\drivers\etc\ open the "hosts" file in Administrator
mode.
Add the following code to it. Here
127.0.0.1 worktick.local
Step 3 : Now go to, C:\xampp\apache\conf\extra for xampp users and for the wamp user
"C:\wamp\bin\apache\Apache2.4.4\conf\extra"
and open "httpd-vhosts.conf" file. Now add the following code into it.
Notes :Change the Document root as per your project also add domain name as you define
into the "hosts" file.
Step 4 : Last but the important step is to restart your Xampp
Setup Installation : Access the url http://worktick.local/setup
2) Installation With Laragon
Step 1 Install Laragon : Go to Laragon download
page , download the latest version then just run the installer: Next, Next, Next...
Laragon starts instantly and I recommend to set it up to run when Windows starts.
Step 2 : Extract the worktick.zip to C:/laragon/www/worktick
Step 3 : start your Laragon
Setup Installation : Access the url http://worktick.test/setup
Nginx
If you are deploying your application to a server that is running Nginx, you may use the following configuration file as a starting point for configuring your web server.
Please ensure, like the configuration below, your web server directs all requests to your application's public/index.php file. You should never attempt to move the index.php file to your project's root, as serving the application from the project root will expose many sensitive configuration files to the public Internet:
read more : https://laravel.com/docs/8.x/deployment#nginx
Installation In Server
Step 1 : Login to cPanel and navigate to File Manager
Step 2 : Not develop to work in sub folder. create a subdomain or use it in main domain.,
then click "Upload"
Step 3 : Select your zip file and wait for upload to complete
Step 4 : Unzip the uploaded file
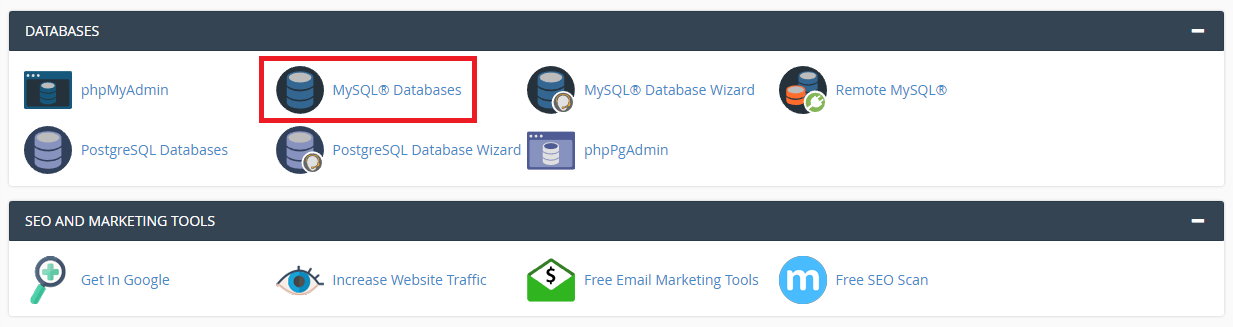
Step 6 : Go back to Cpanel and navigate to Databases
Creating a new database
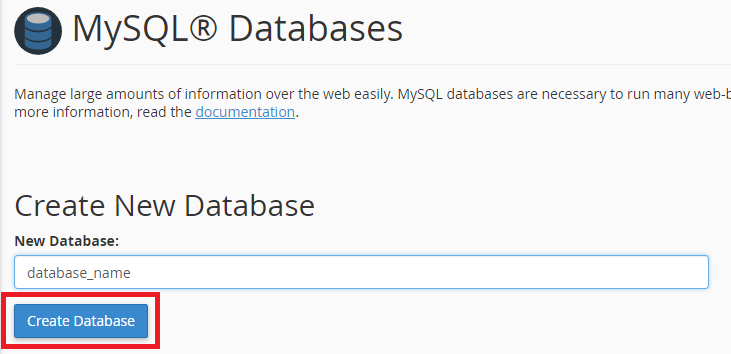
Before installing, you will need to create a new database. If you already know how to do this or have
already created one, skip to the next step.Please use empty database. In most cases you should be able to create a
database from your cpanel.
Now you need to create a new user. On the same page go to create a new database user
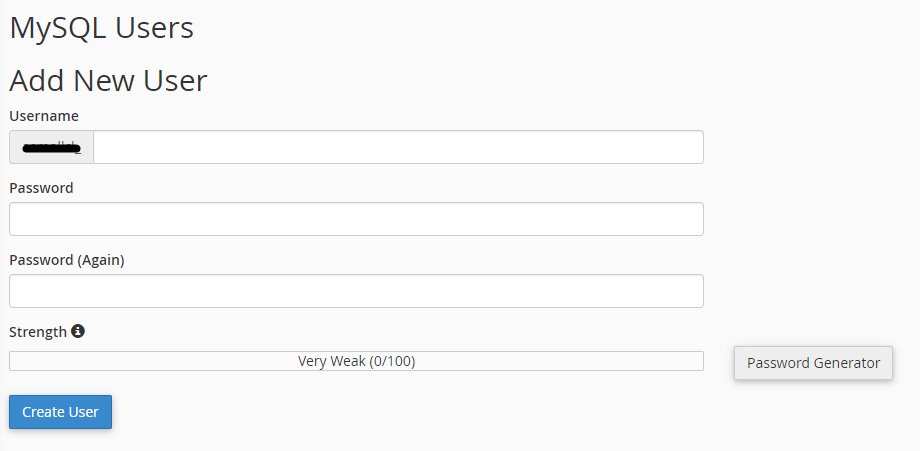
Now add the user to the database
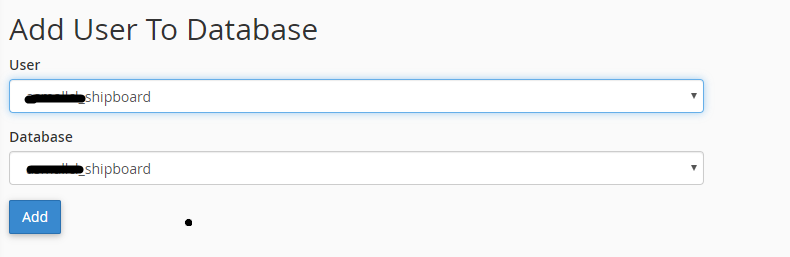
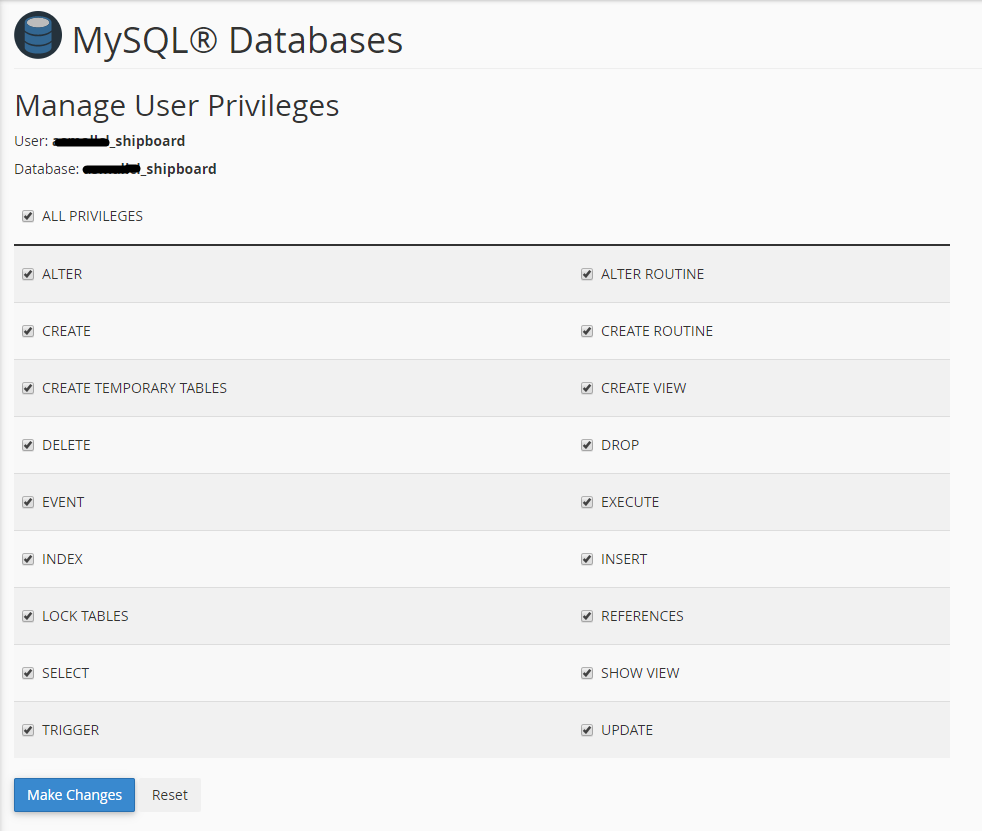
And select full permissions on the database to that user
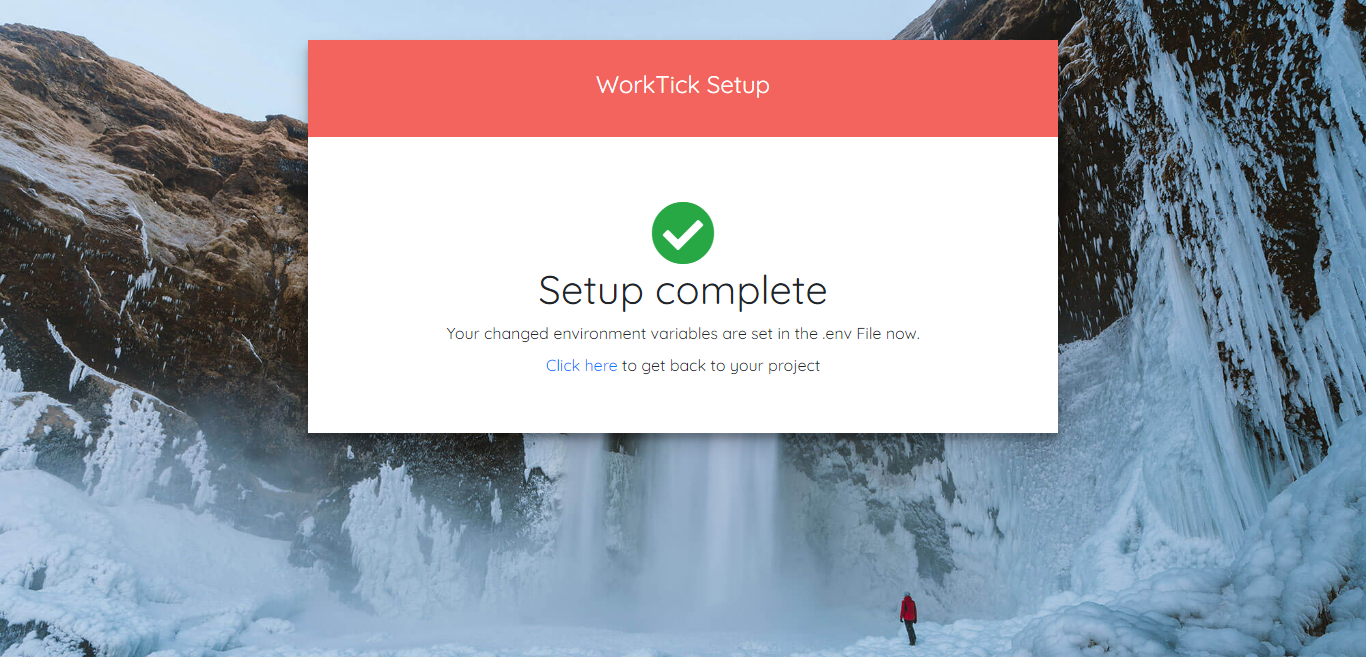
Setup Installation : Access the url yourdomain.com/setup and complete the installation
- Check Server Requirements
Step 1:
- Name your application
- Select Environnement : Local in localhost and production in Server
- App Debug : it's better to choose false In server
Step 2:

- DB HOST
- DB PORT
- DB DATABASE
- DB USERNAME
- DB PASSWORD
- You can test connexion with database
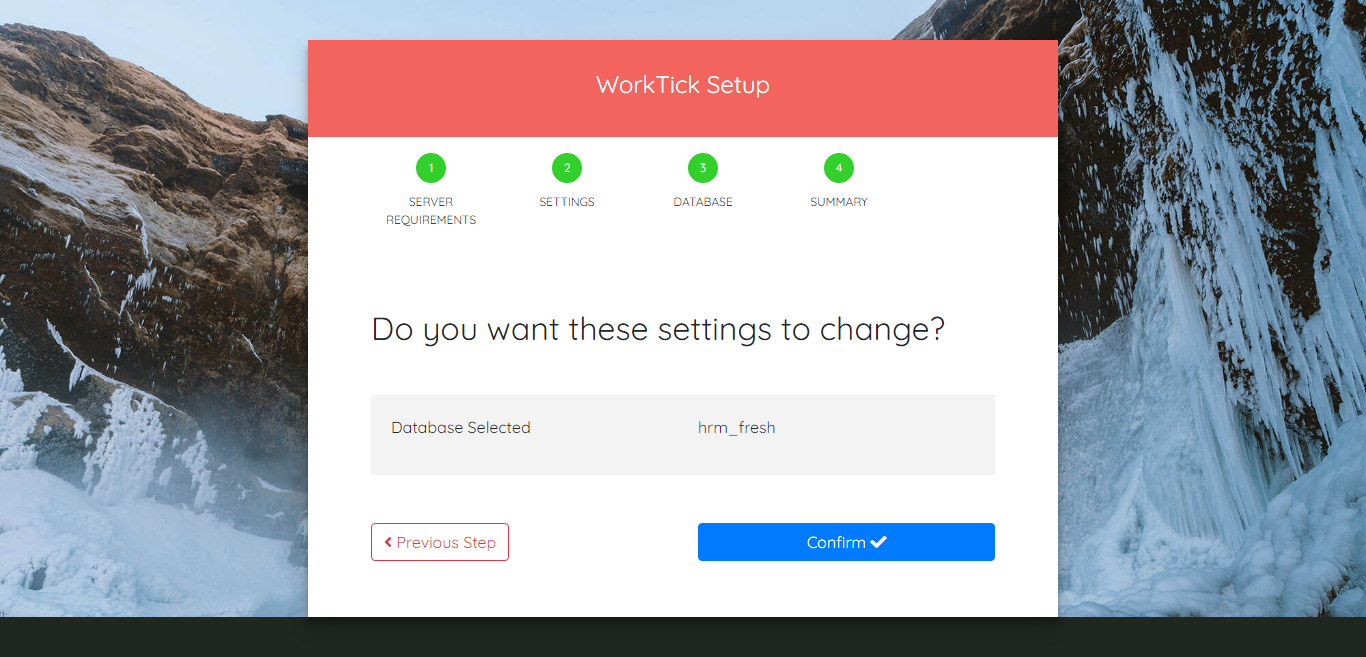
Step 3:

Last Step:
Click in Confirmed and waiting for generate database
Notes : It is not recommended to close the browser or stop a process Installation
Once the installation has ran the empty file installed will be placed into the /storage directory. If this file is present the route /setup will abort to the 404 page.
Update Application
Please follow these steps, To Update your application
Note: If you have made any changes in the code manually then your changes will be lost.
- Step 1 : Take back up of your database. Go to /settings/backup Click on Generate Backup , You will find it in /storage/app/public/backup and save it to your pc To restore it if there is an error , or Go to your PhpMyAdmin and export your database then and save it to your pc To restore it if there is an error
- Step 2 : Take back up of your files before updating.
- Step 3 : Download the latest version from your codecanyon and Extract it .
- Step 4 : Replace all the files and folders except the following :
- Folder : Modules
(If you have any Module installed) - file : modules_statuses.json
(If you have any Module installed) - file : .env
- file : .htaccess
- Folder : storage
- Folder : images folder in public : /public/assets/images
- Folder : Modules
- Step 5 : Visit http://your_app/update_database to update your database
- Step 6 : Hard Clear your cache browser
- Step 7 : You are done! Enjoy the updated application
Note: If any pages are not loading or blank, make sure you cleared your browser cache.
How to backup your database
Method 1 : With system setting
Go to /app/settings/Backup and Click on Generate Backup
You will find backup in /storage/app/public/backup , and save it to your pc To restore it if there is an error
if you use xampp and you want to make a backup Please open your '.env' file and change
DUMP_PATH=mysqldump
ToDUMP_PATH=C:\xampp\mysql\bin\mysqldump.exe
if you use Laragon and you want to make a backup Please open your '.env' file and change
DUMP_PATH=mysqldump
ToDUMP_PATH=C:\laragon\bin\mysql\mysql-5.7.24-winx64\bin\mysqldump.exe
if you want make a cron job for generate backup dynamically add this cron on your cpanel :
php artisan database:backupIf there is an error you can use method 2 bellow
Method 2 : Use PhpMyAdmin
step 1: log in to cpanel step 2: in the DATABASES section of the cpanel home screen , click PhpMyAdmin
The phpMyAdmin administration page appears in a new window
step 3 : In the left pane of the phpMyAdmin page , click the database that you want export
step 4 : Click the Export tab
step 5 : Under Export method , confirm that Quick is selected
step 6 : Click Go or execute .
Login
login by default
Email :admin@example.comPassword :123456
you can change password for security purpose

Dashboard
Dynamic dashboard
- Total employees
- Total Clients
- Total Projects
- Total Tasks
- This Week Expense & Deposit
- Projects by status
- Latest employees
- Tasks by status
- Employee count by department
- Expense vs Deposit

User Controller
You can manage all User

You can create or edit user

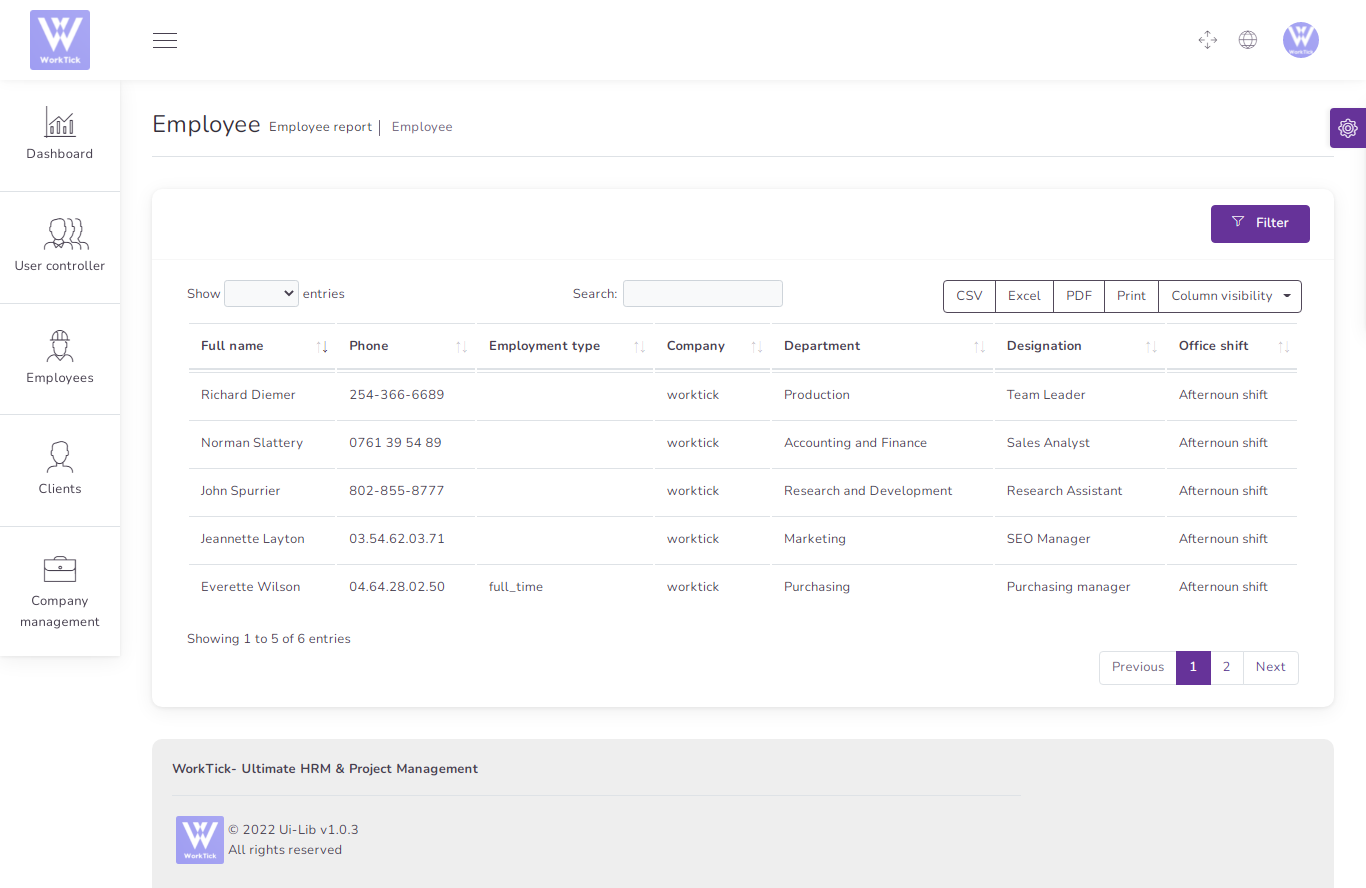
Employee
to create a new employee it's very easy
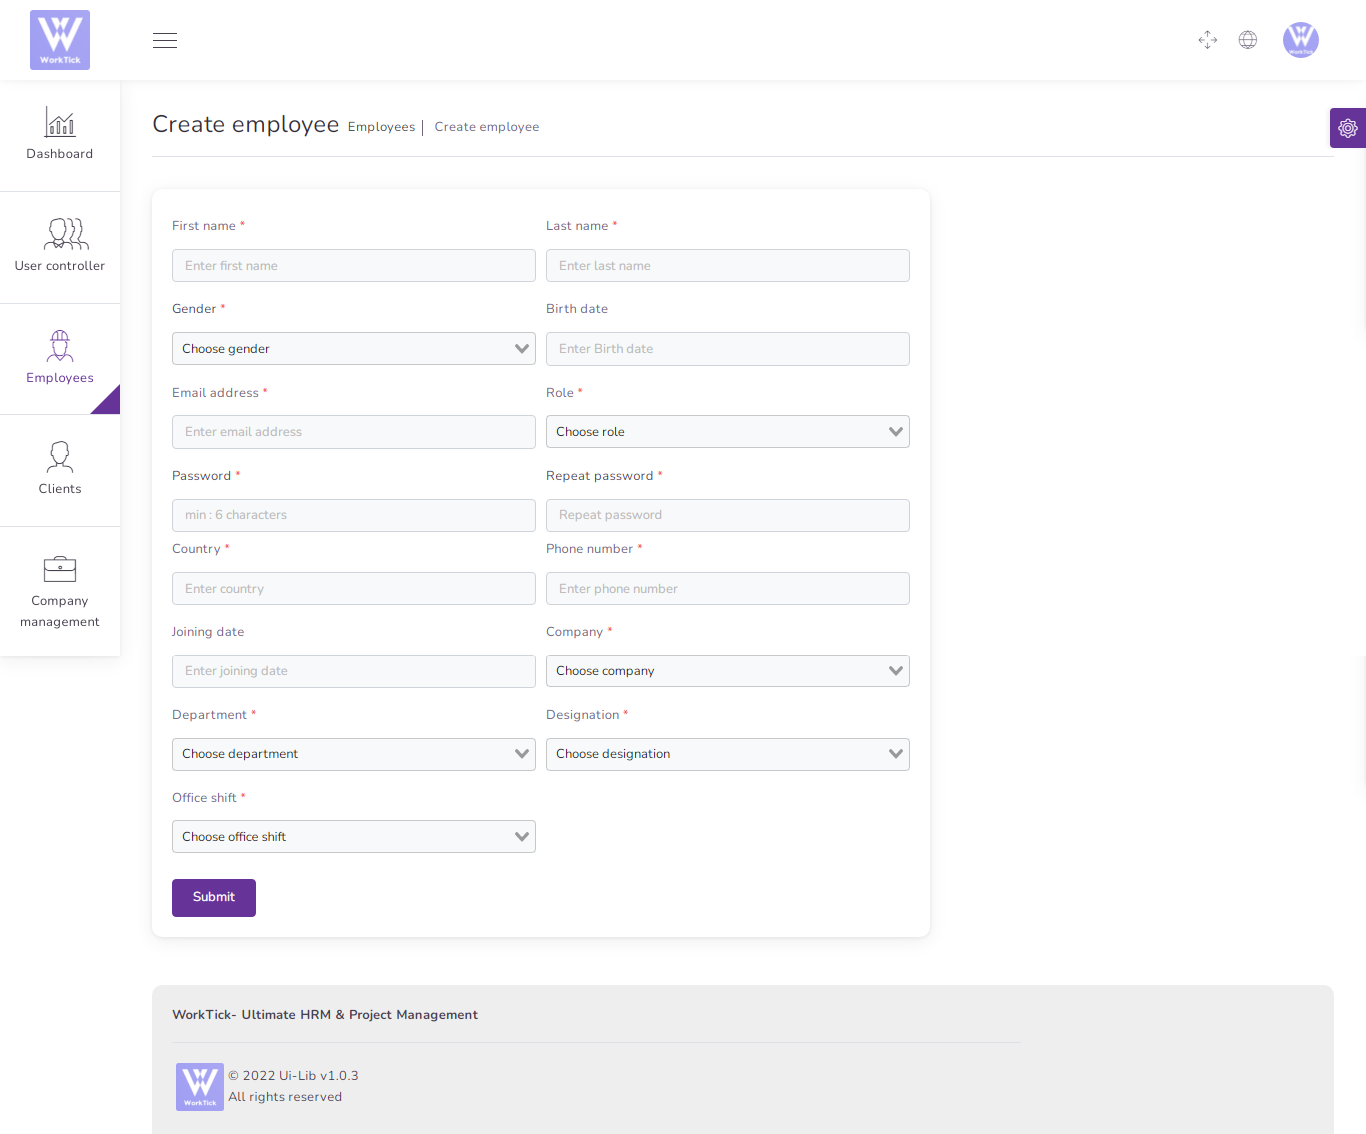
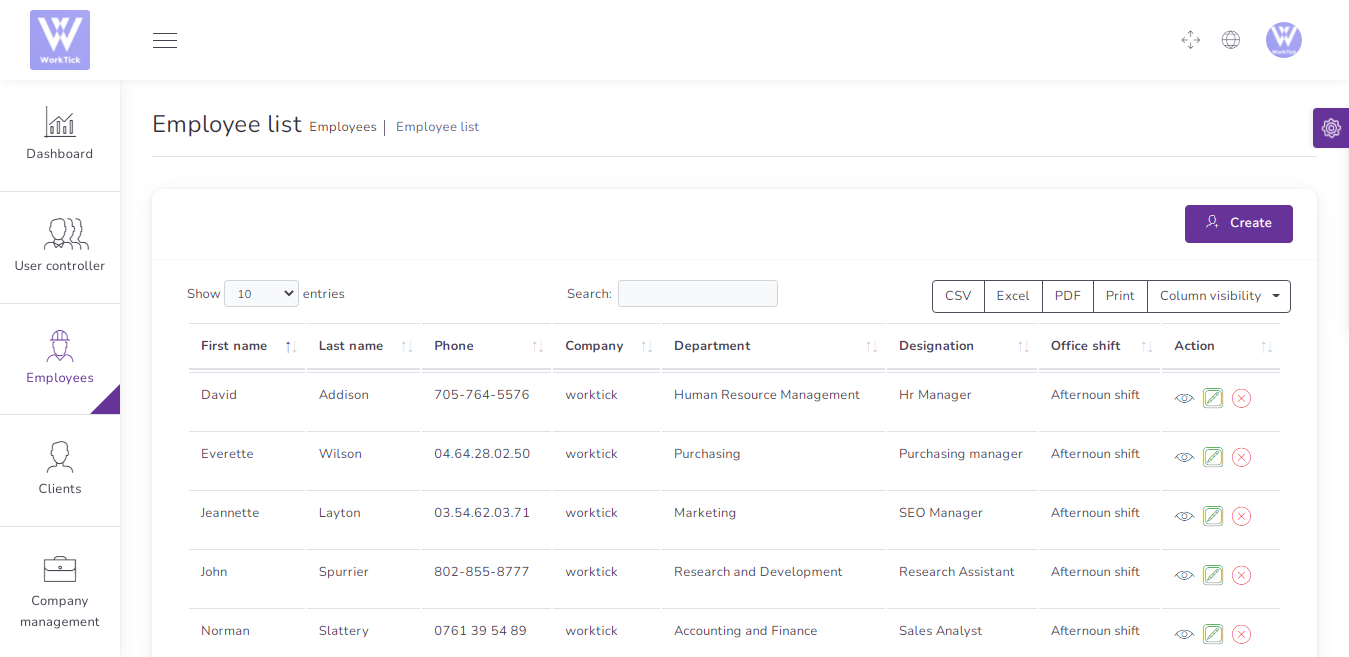
You can manage employee list
- Edit employee
- View Details employee
- Delete employee
- Csv ,Excel, pdf, Print Employee
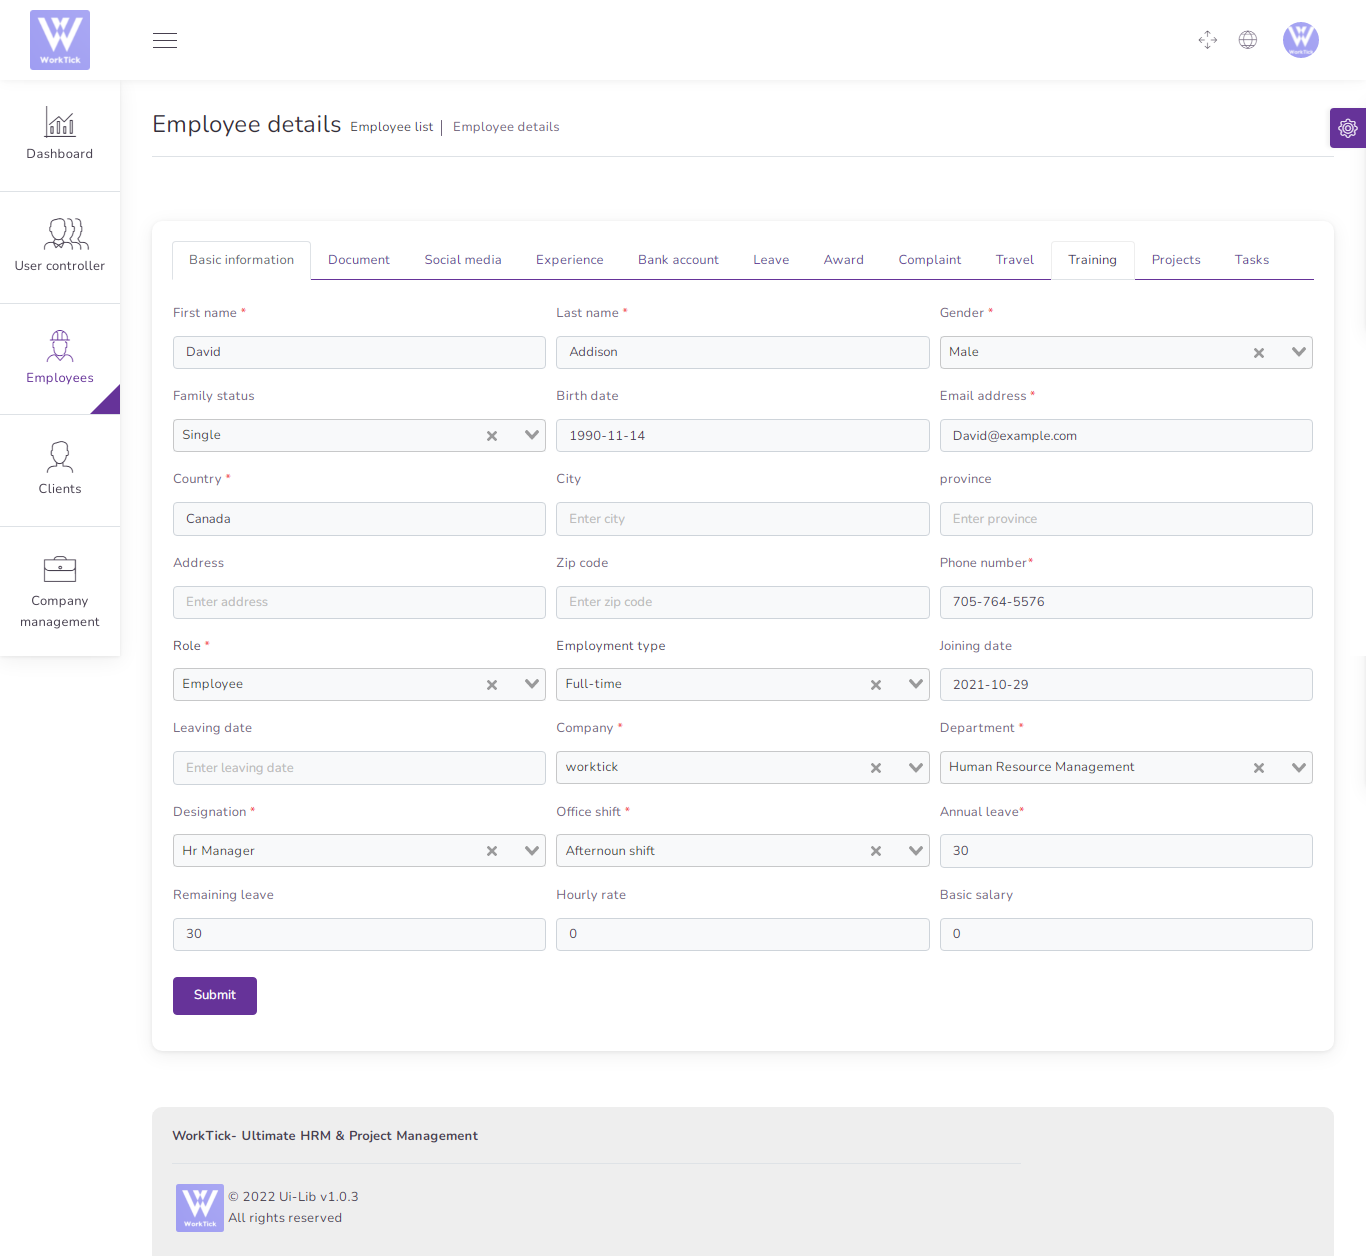
Employee details
- Basic Information
- documents
- Social media
- Experiance
- Bank accounts
- Leave
- Award
- Complaint
- Travel
- Training
- Project
- Task
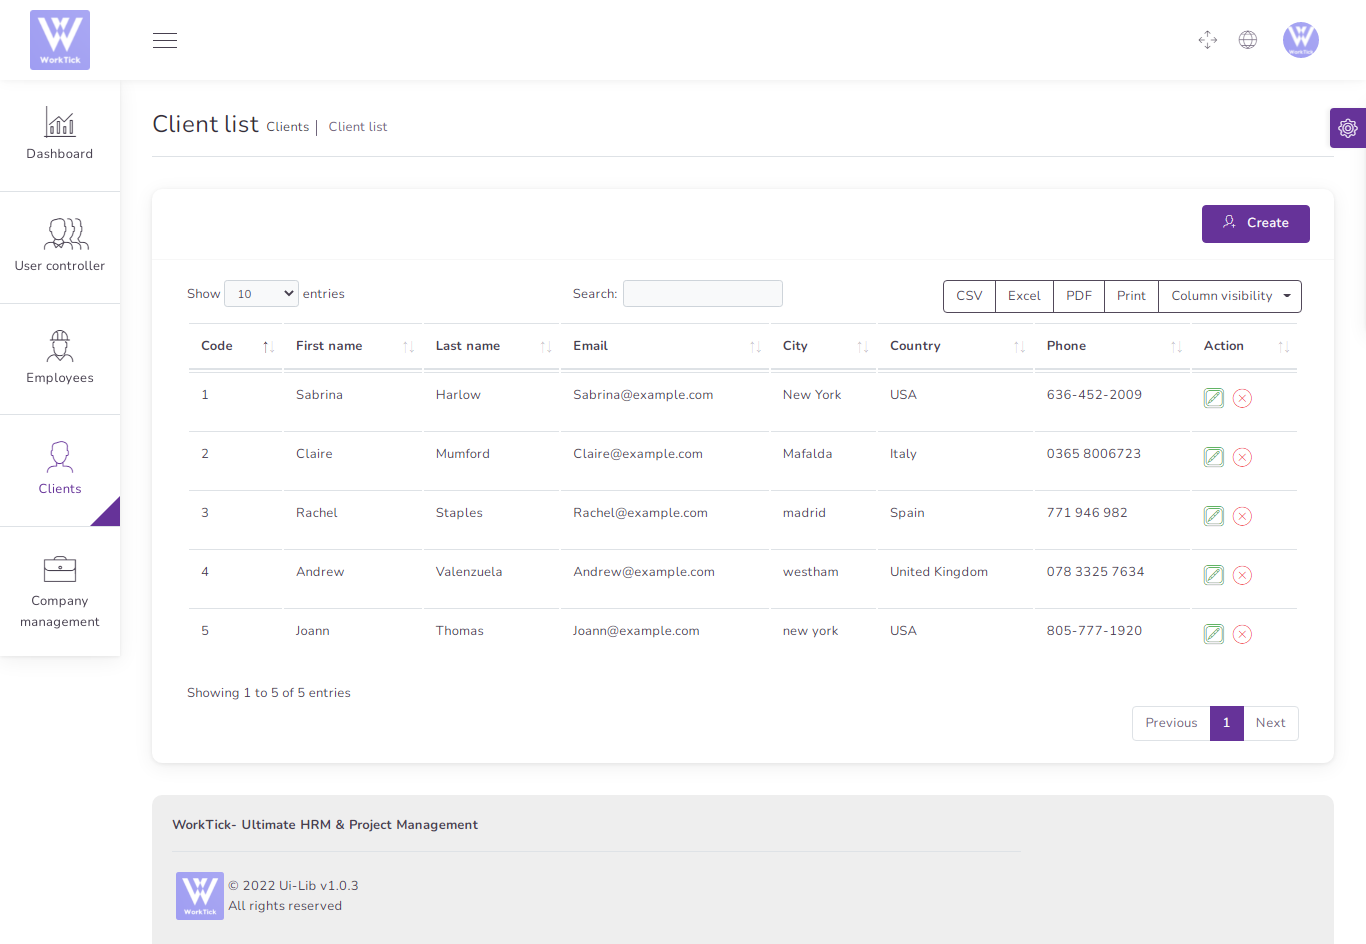
Clients
to create a new client it's very easy
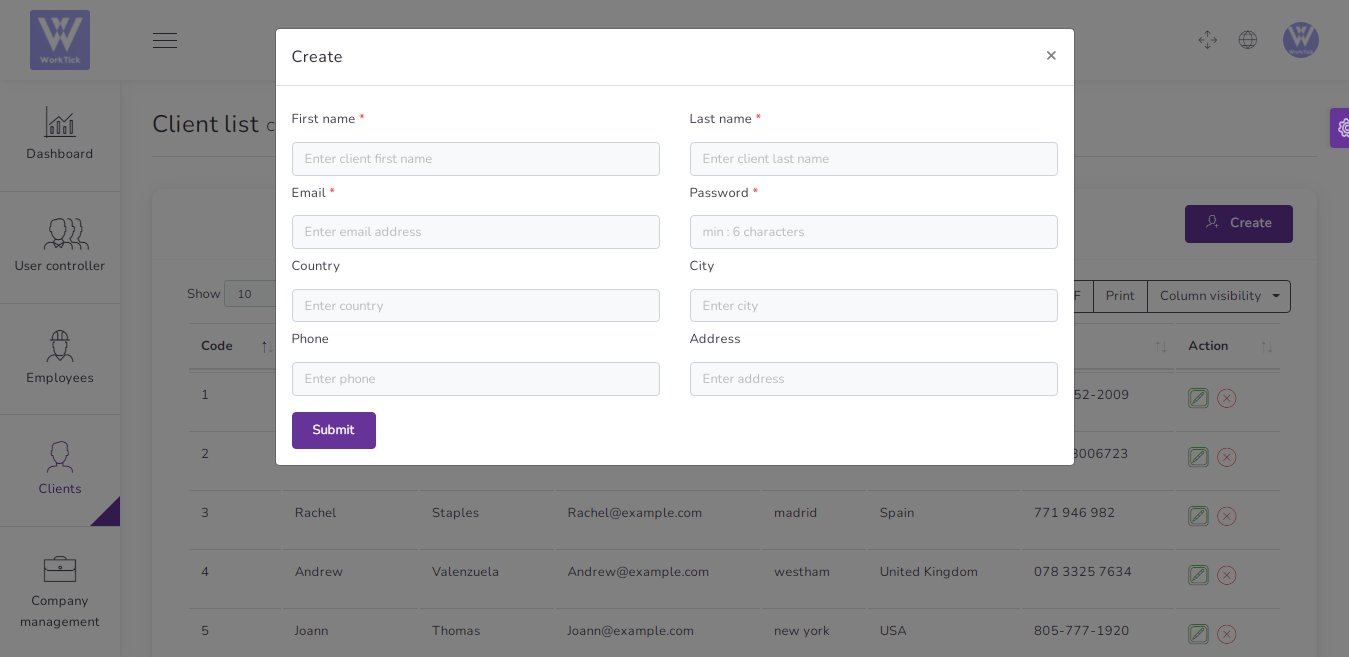
You can manage Client list
- Edit Client
- Delete Client
- Csv ,Excel, pdf, Print Client
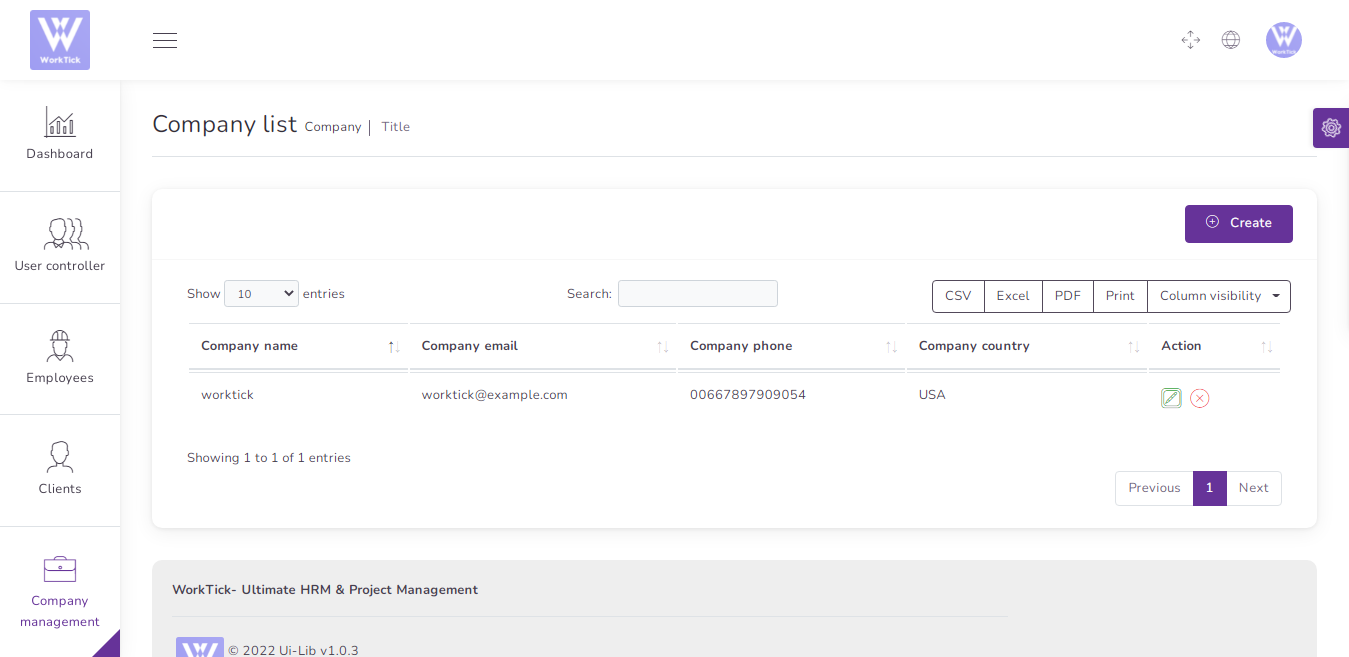
Company
to create a new company it's very easy
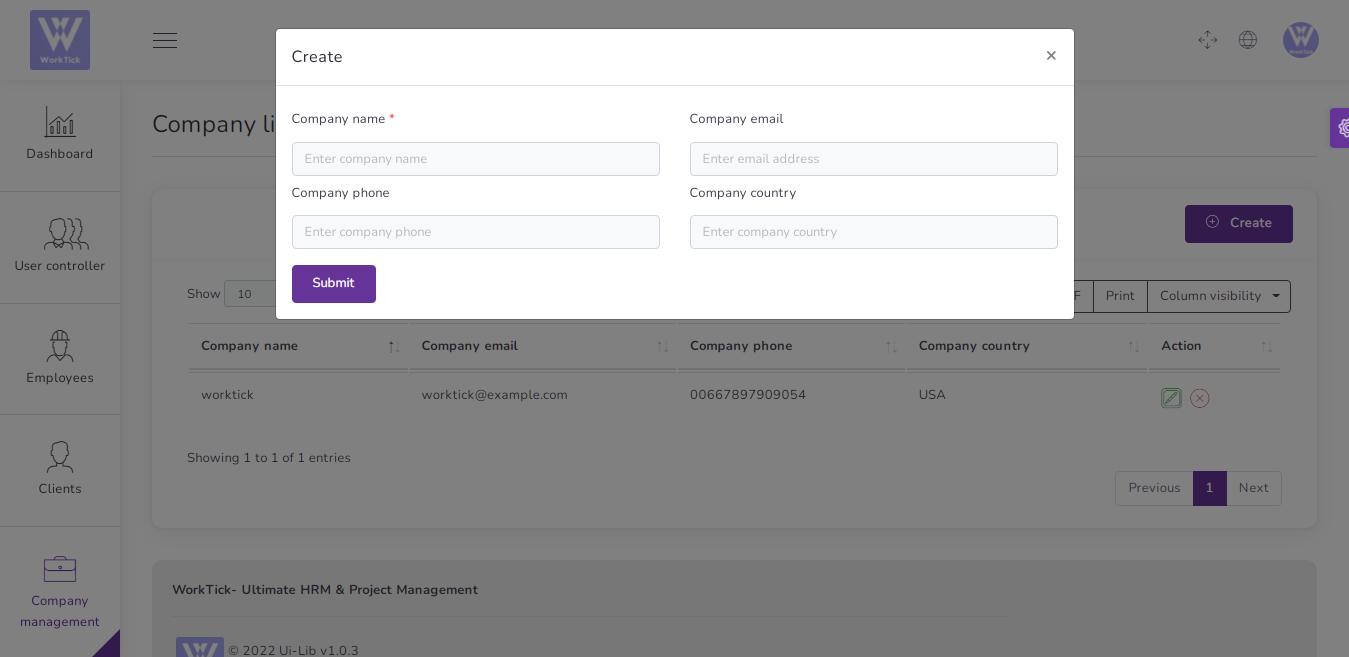
You can manage company list
- Create Multi company
- Edit company
- Delete company
- Csv ,Excel, pdf, Print company
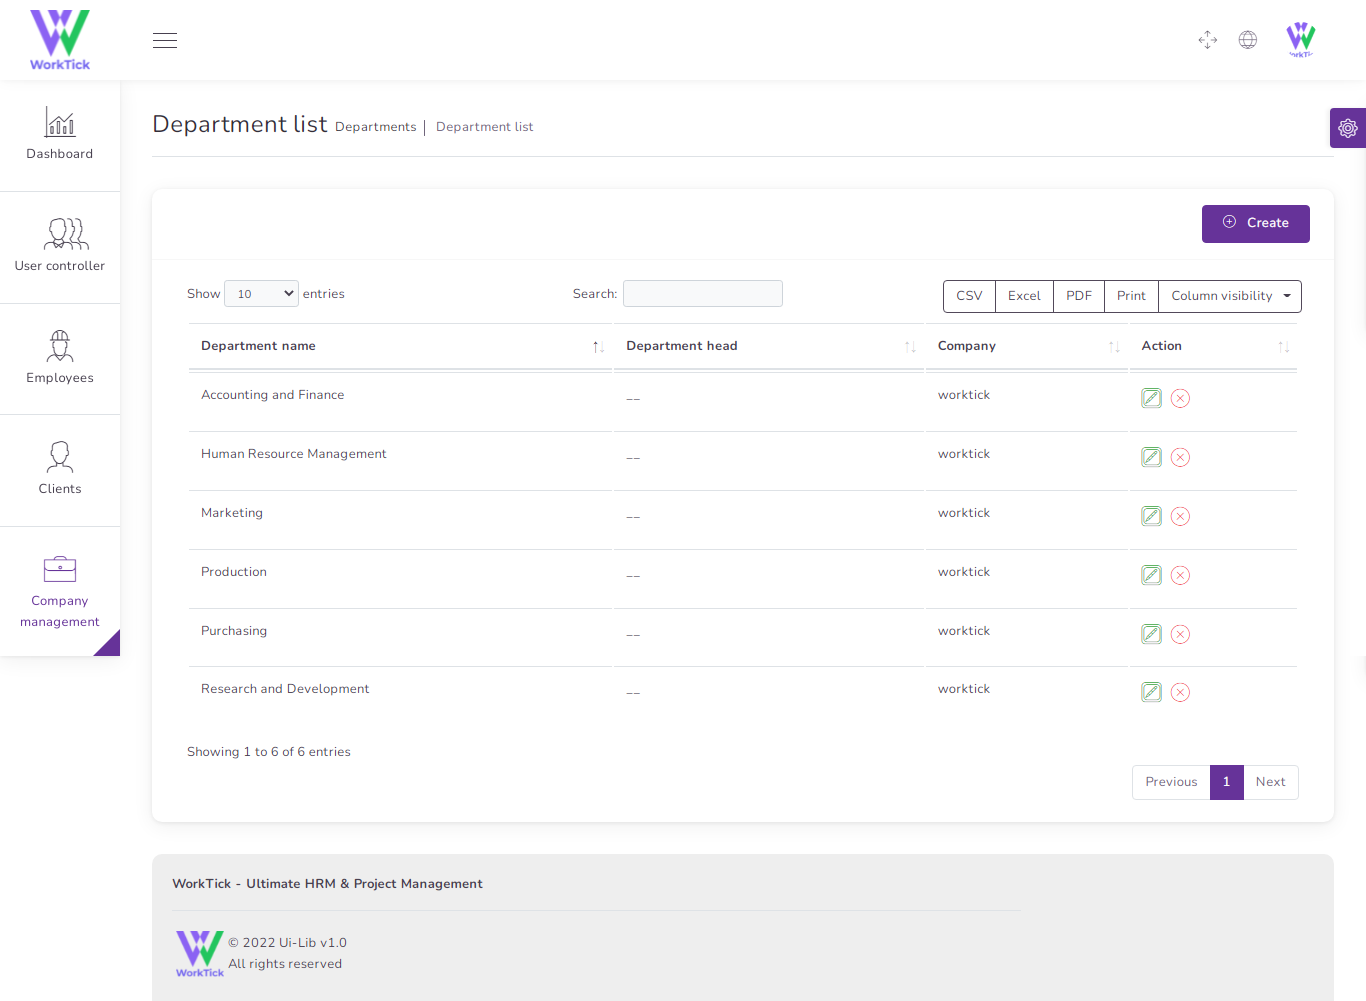
1) Department
to create a Department it's very easy
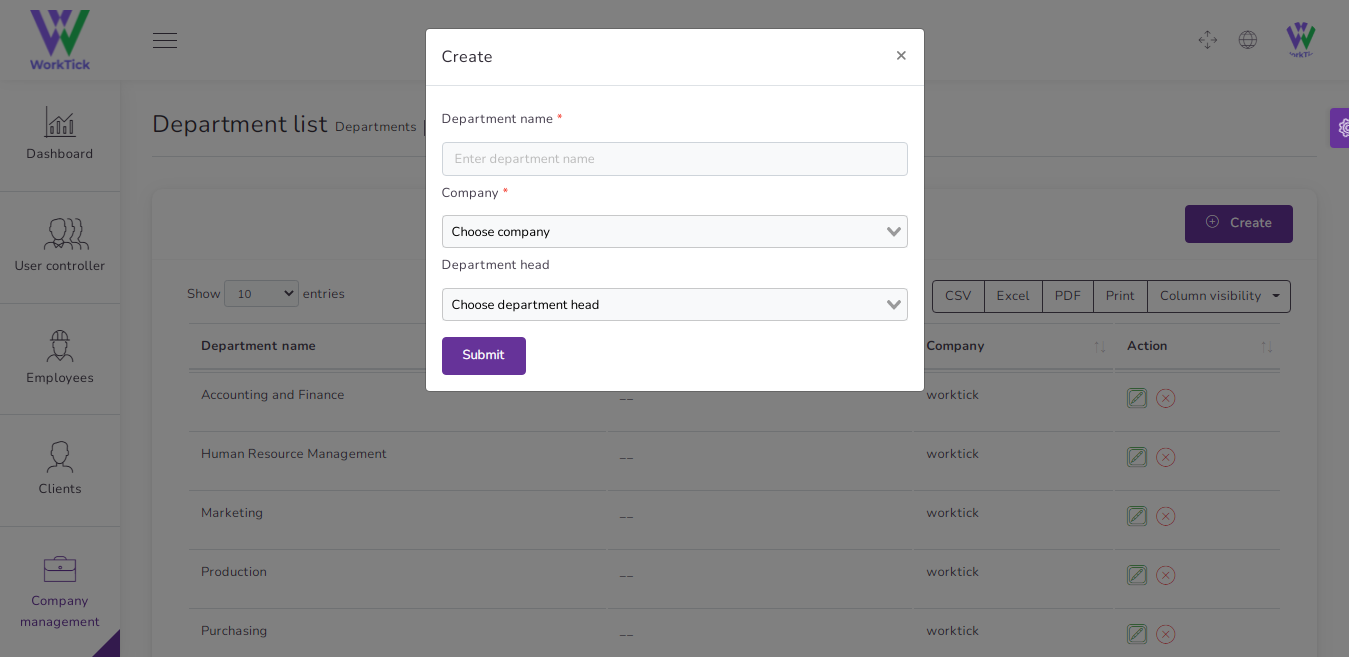
You can manage Department list
- Edit Department
- Delete Department
- Csv ,Excel, pdf, Print Department
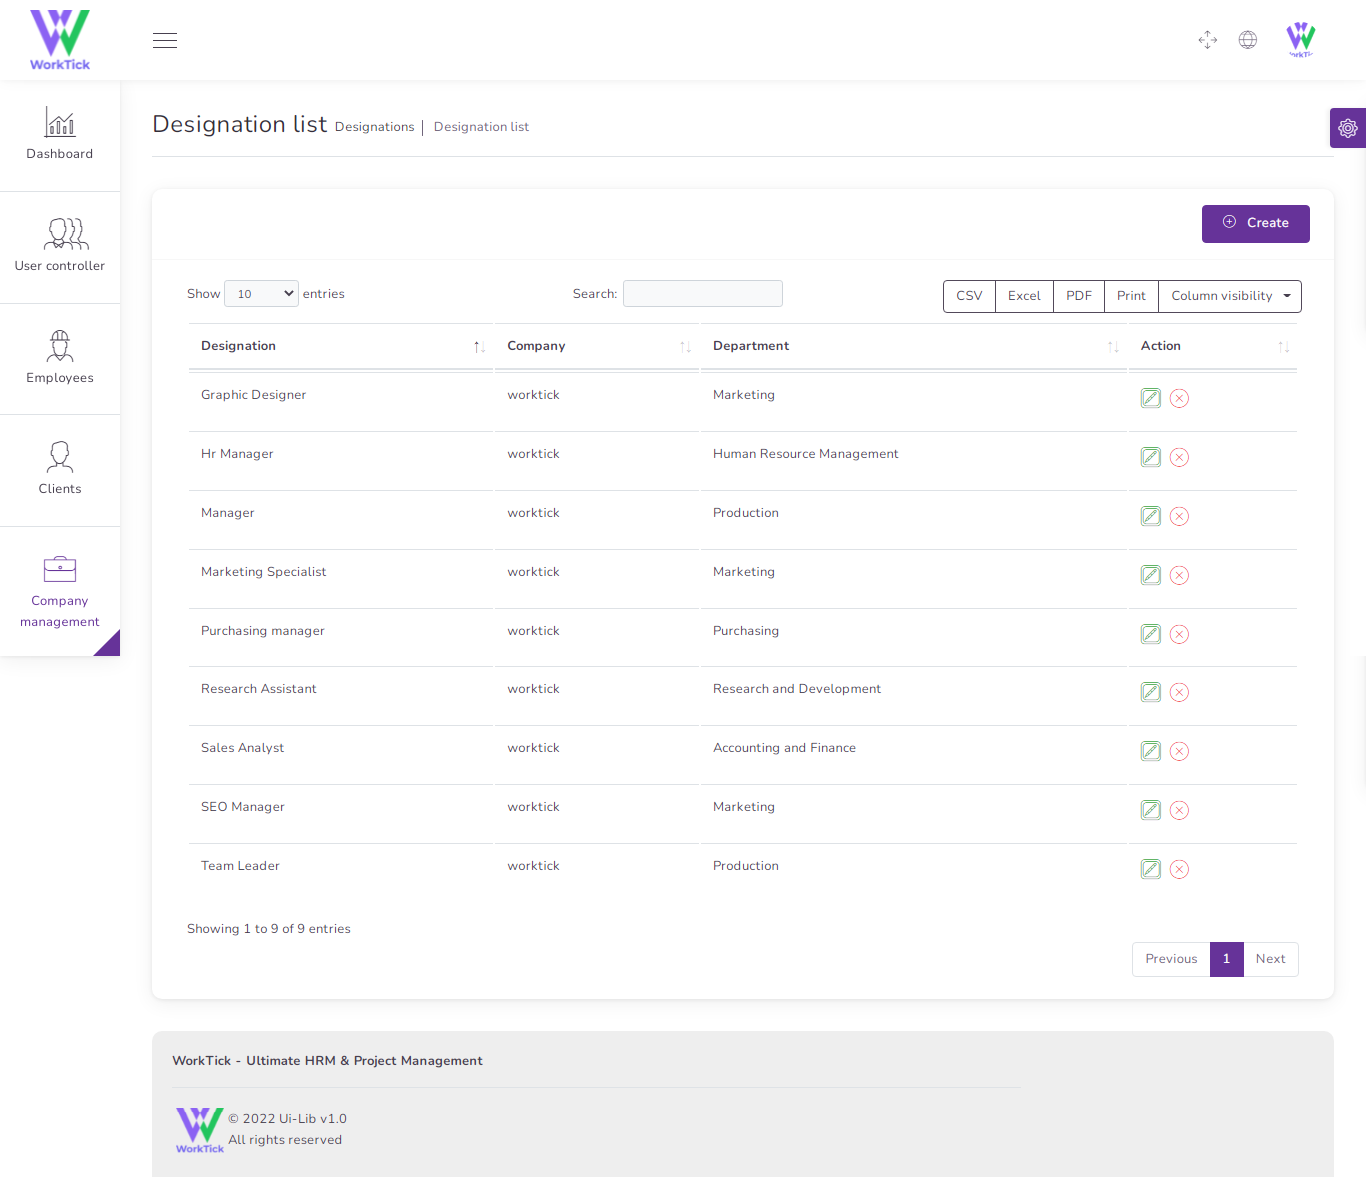
2) Designation
You can Create & manage Department list
- Create Designation
- Edit Designation
- Delete Designation
- Csv ,Excel, pdf, Print Designation
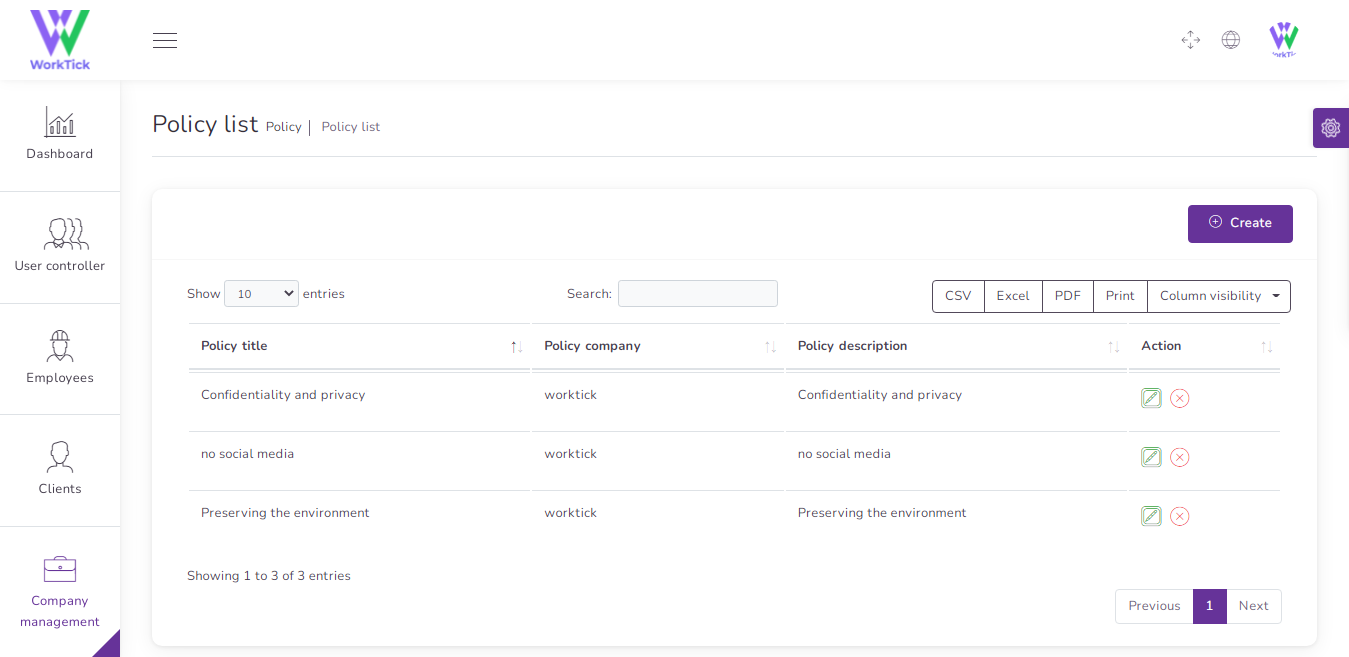
3) Policy
You can Create & manage Policy list
- Create Policy
- Edit Policy
- Delete Policy
- Csv ,Excel, pdf, Print Policy
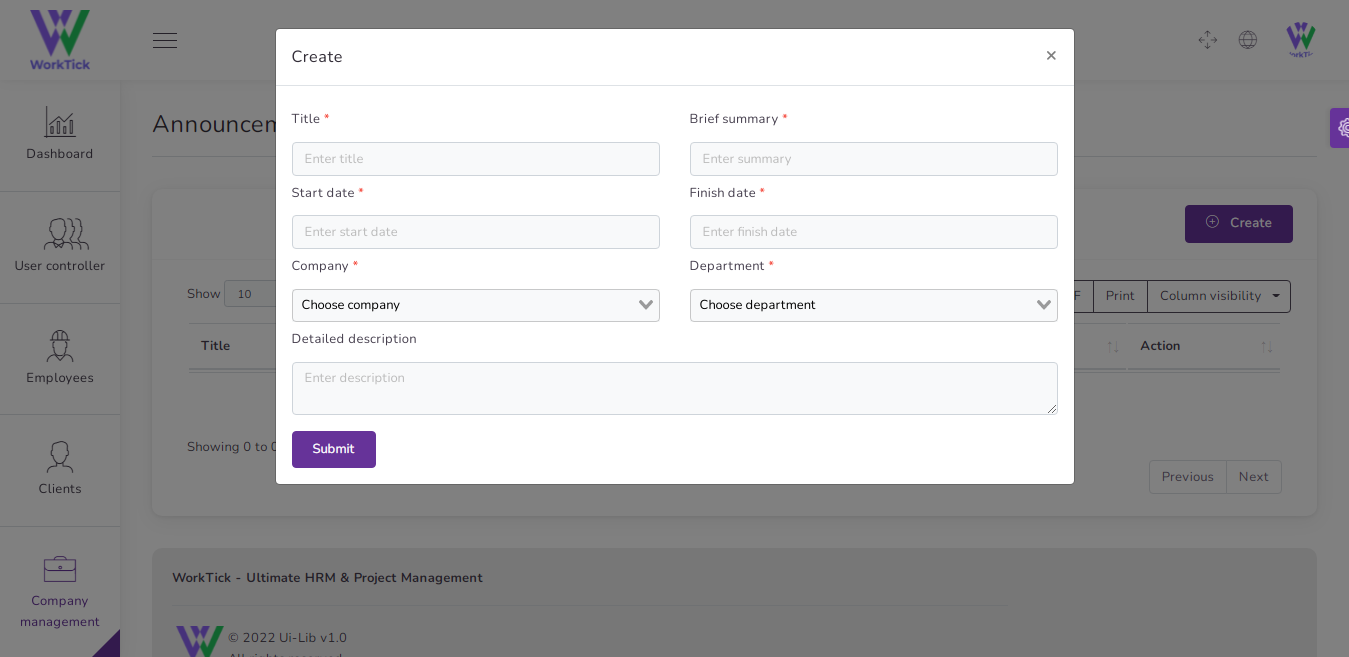
4) Announcement
You can Create & manage Announcement list
- Create Announcement
- Edit Announcement
- Delete Announcement
- Csv ,Excel, pdf, Print Announcement
HR Management
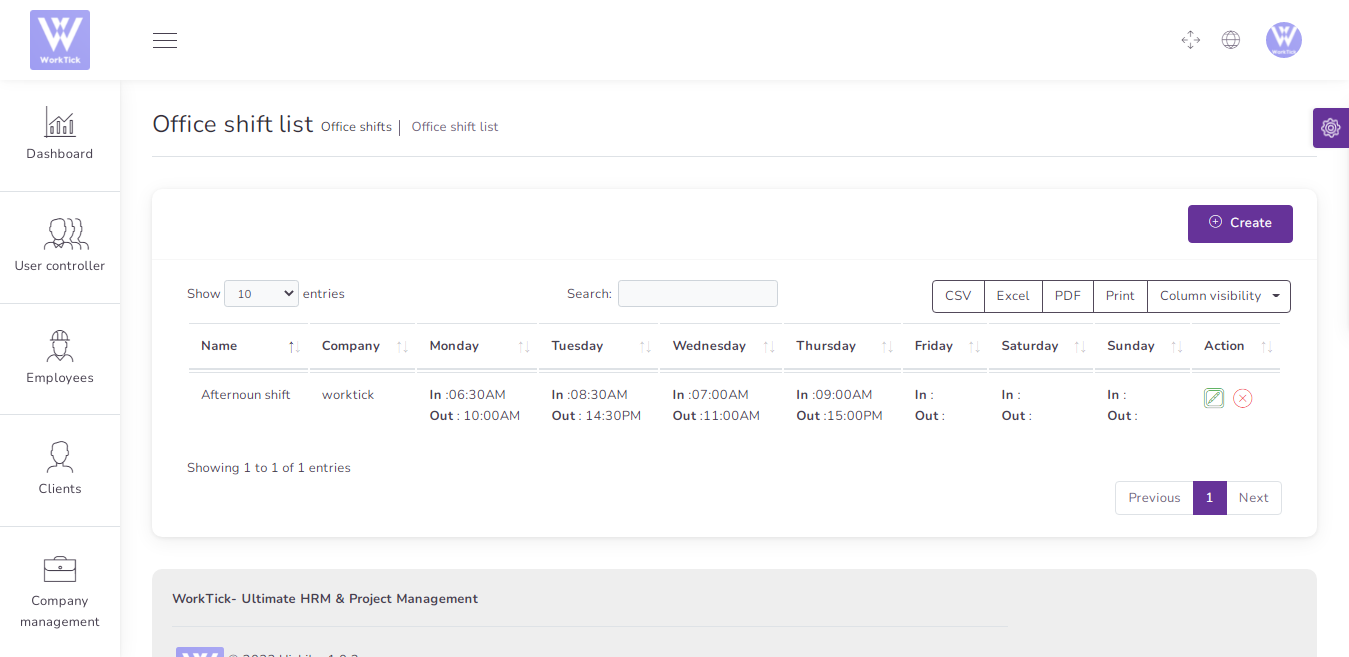
1) Office Shift
to create a new Office Shift it's very easy
You can manage Office Shift list
- Edit Office Shift
- Delete Office Shift
- Csv ,Excel, pdf, Print Office Shift
2) Event
to create a new Event it's very easy
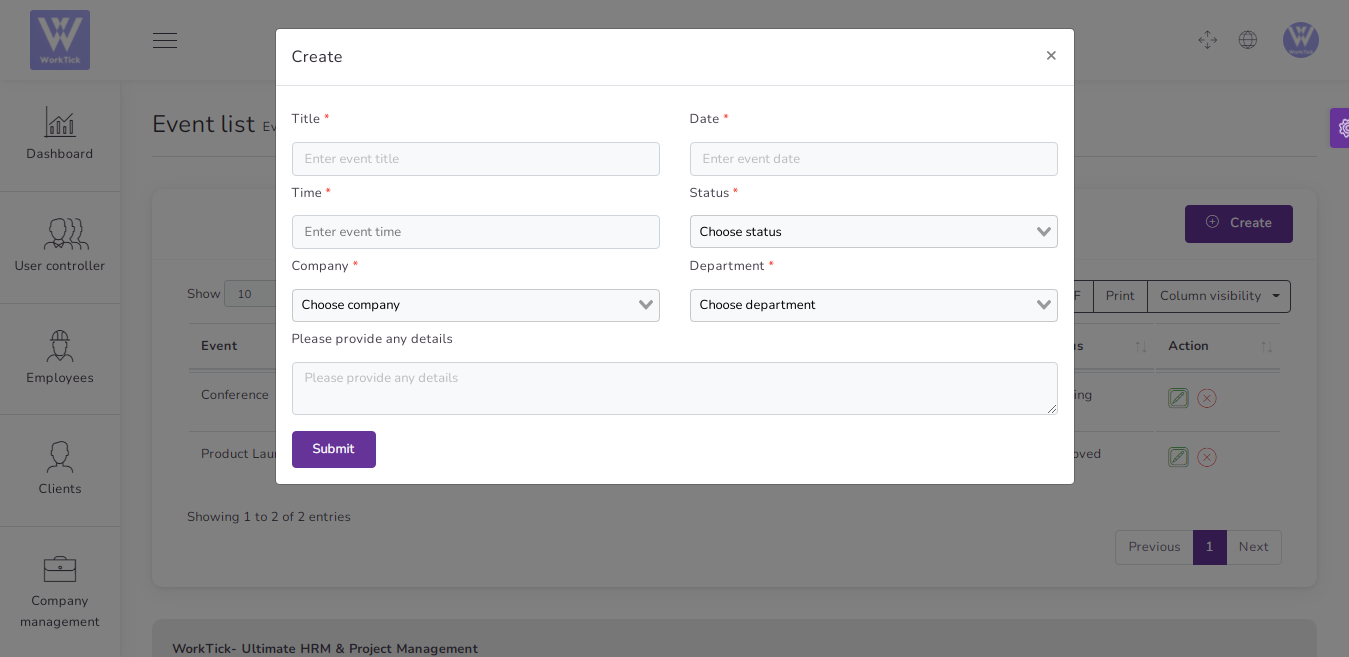
You can manage Event list
- Edit Event
- Delete Event
- Csv ,Excel, pdf, Print Event

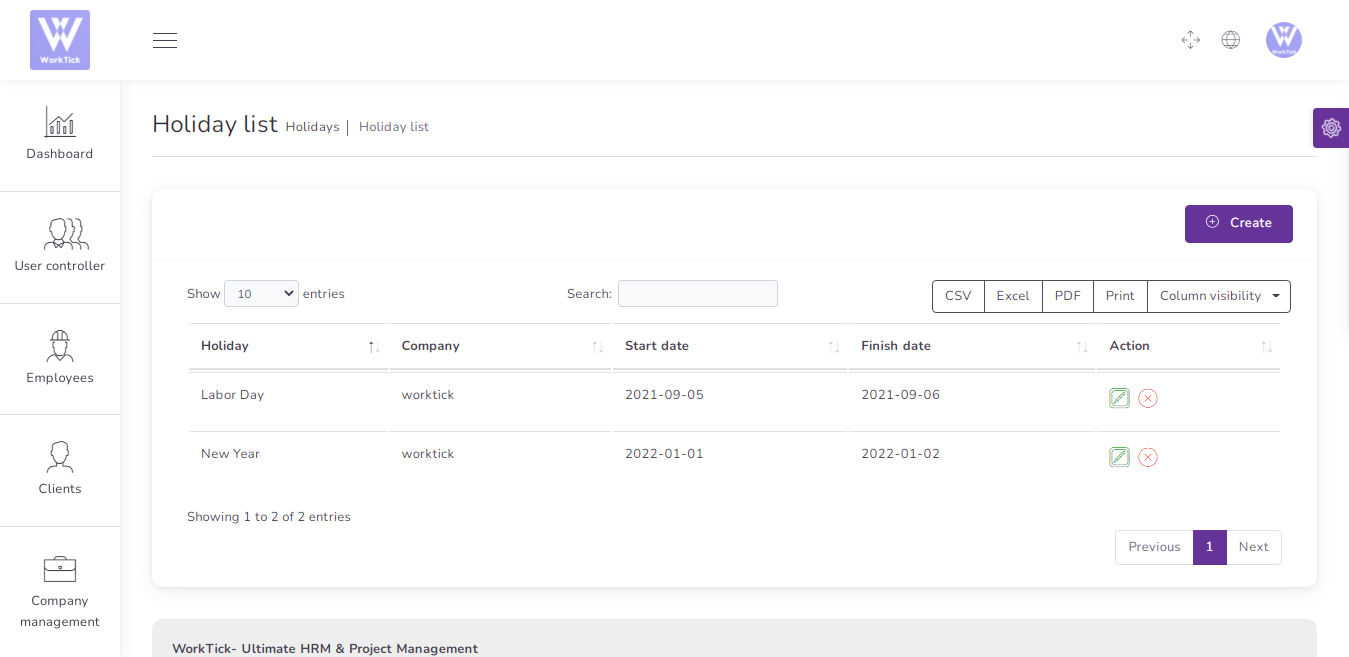
3) Holiday
to create a new Holiday it's very easy
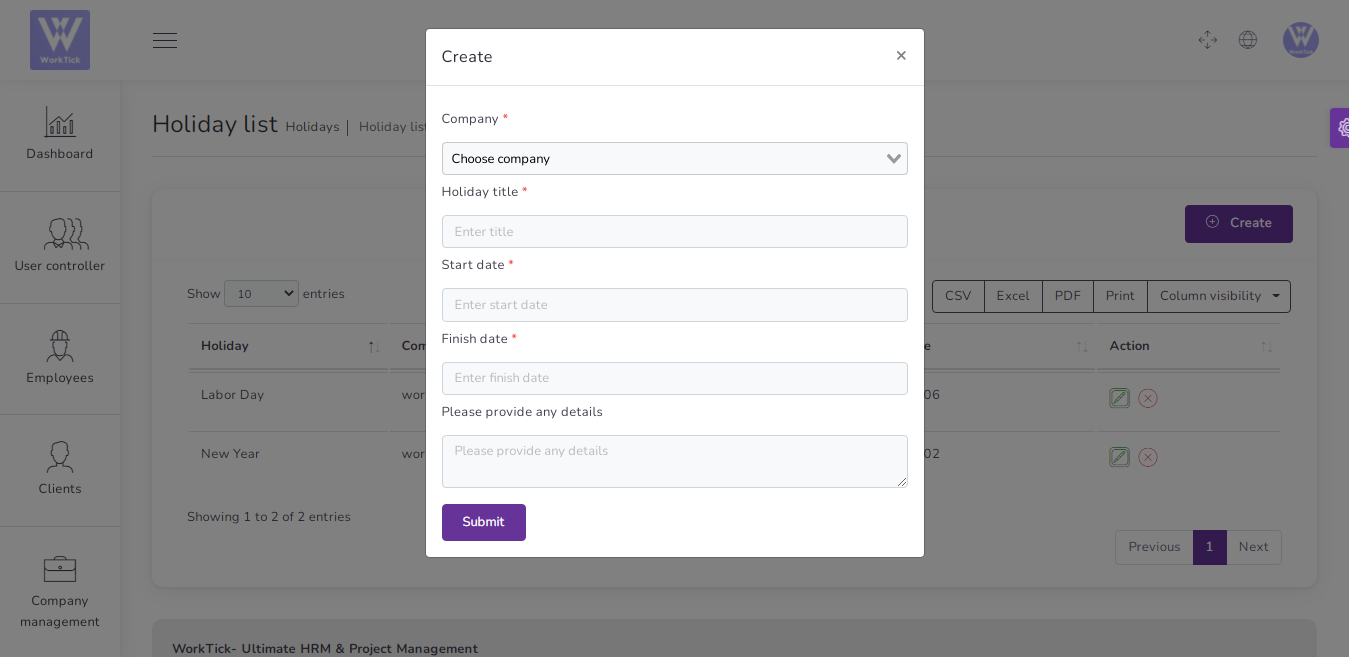
You can manage Holiday list
- Edit Holiday
- Delete Holiday
- Csv ,Excel, pdf, Print Holiday
4) Award
to create a new Award it's very easy
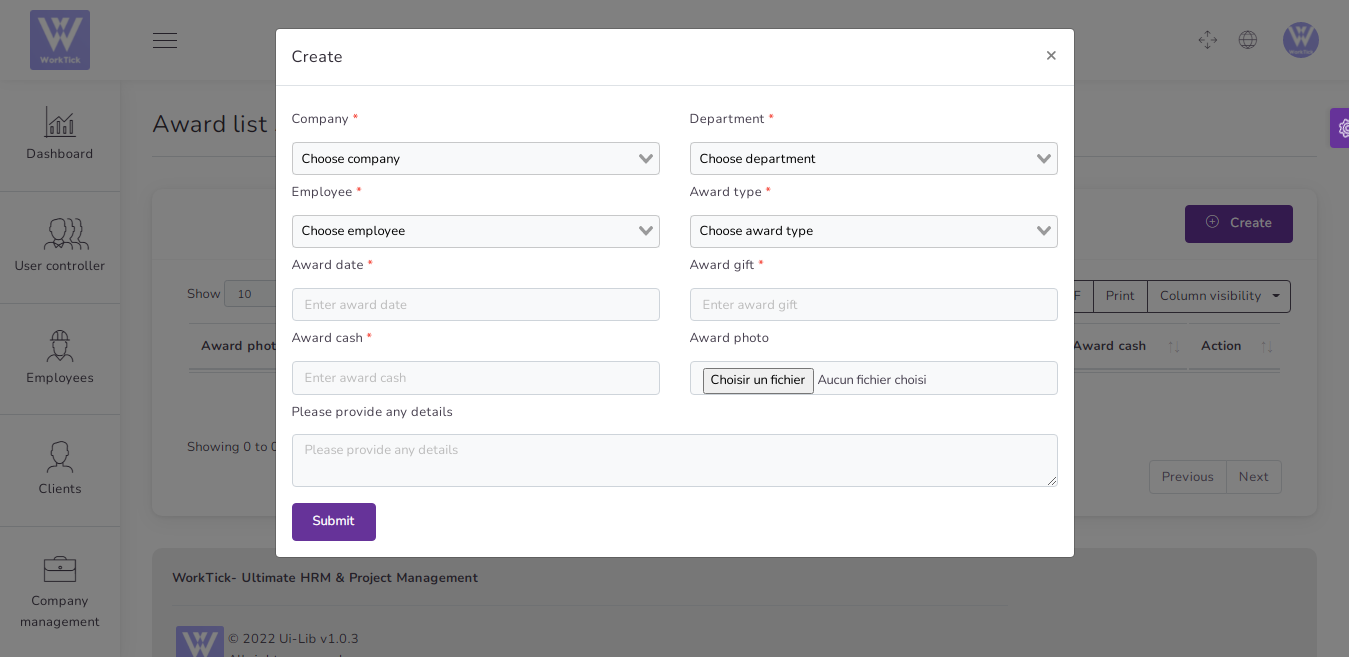
You can manage Award list
- Edit Award
- Delete Award
- Csv ,Excel, pdf, Print Award

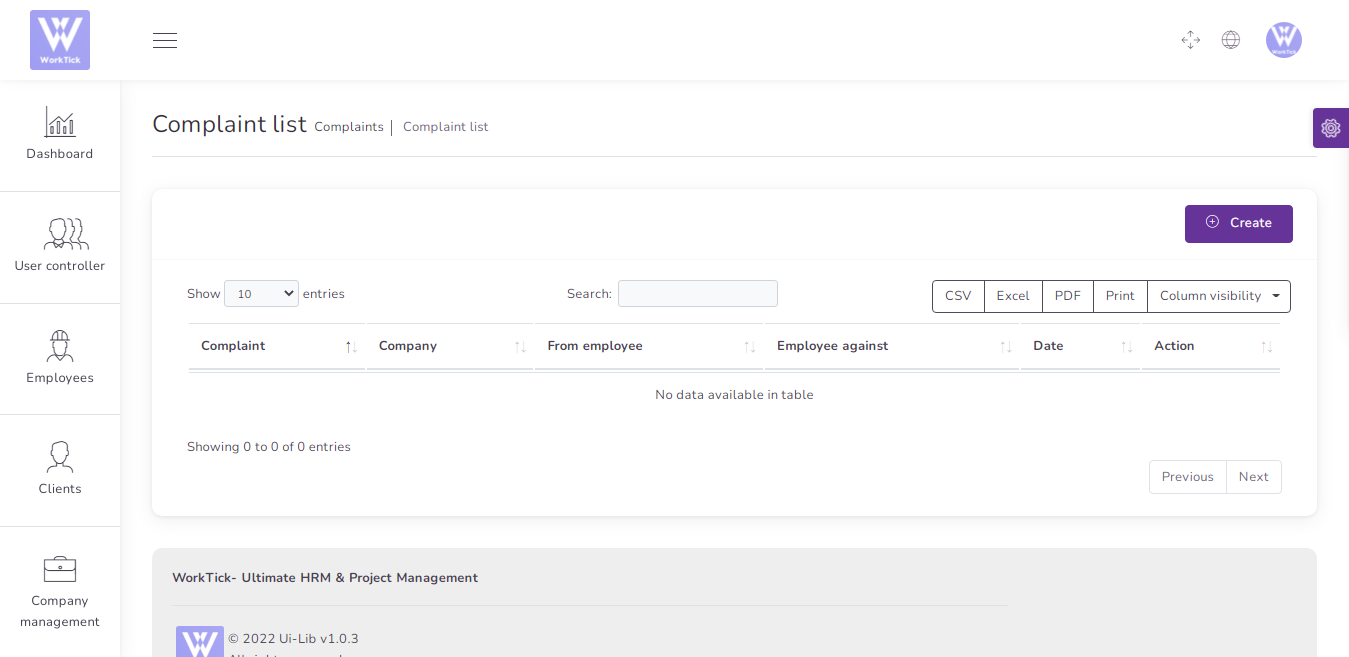
5) Complaint
to create a new Complaint it's very easy
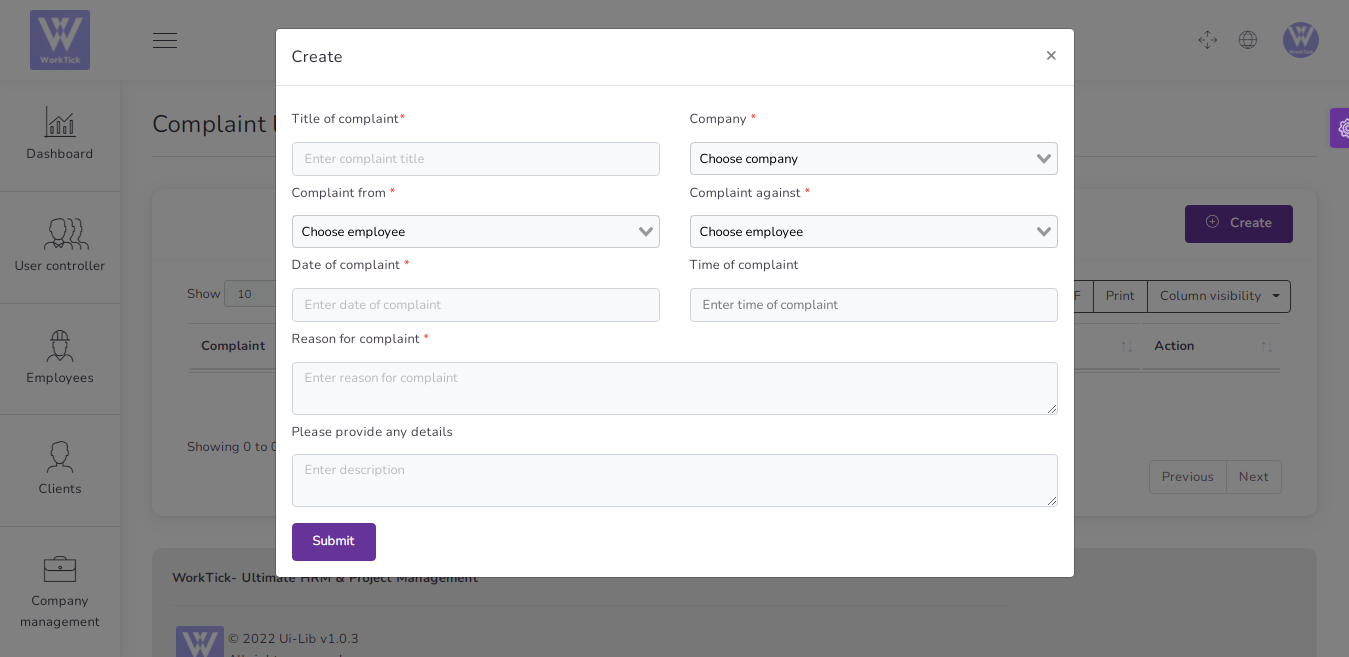
You can manage Complaint list
- Edit Complaint
- Delete Complaint
- Csv ,Excel, pdf, Print Complaint
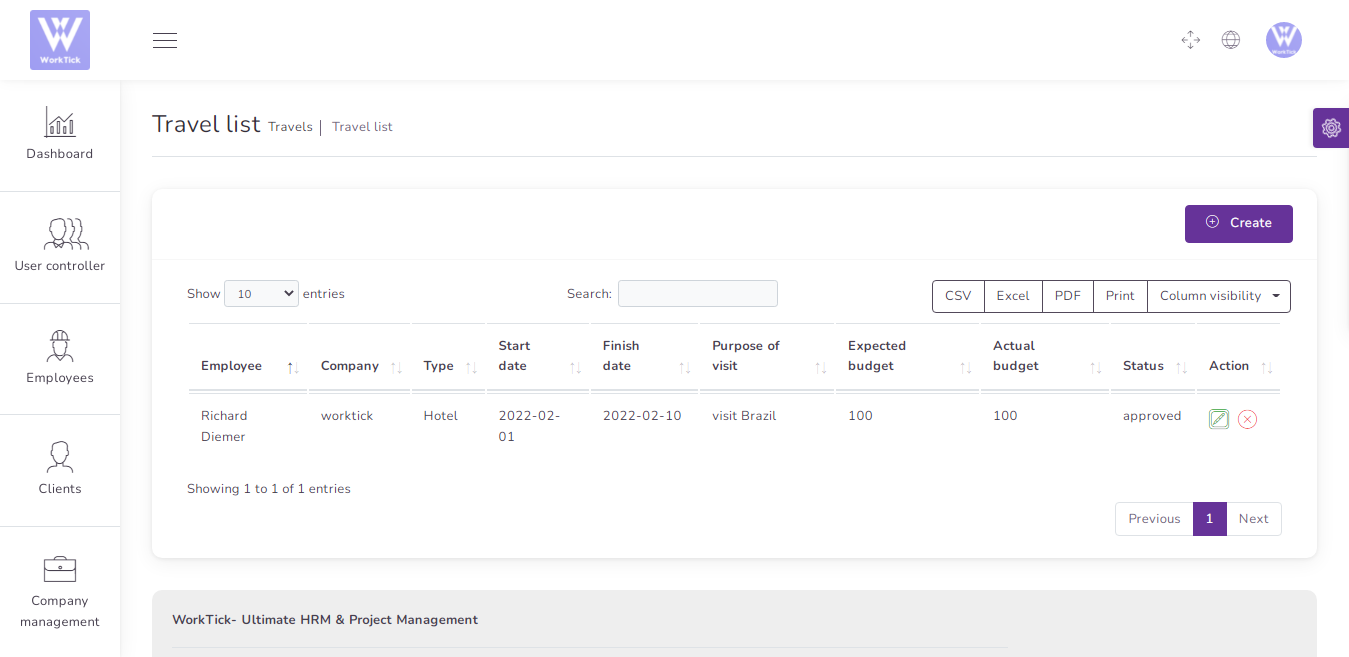
6) Travel
to create a new Travel it's very easy
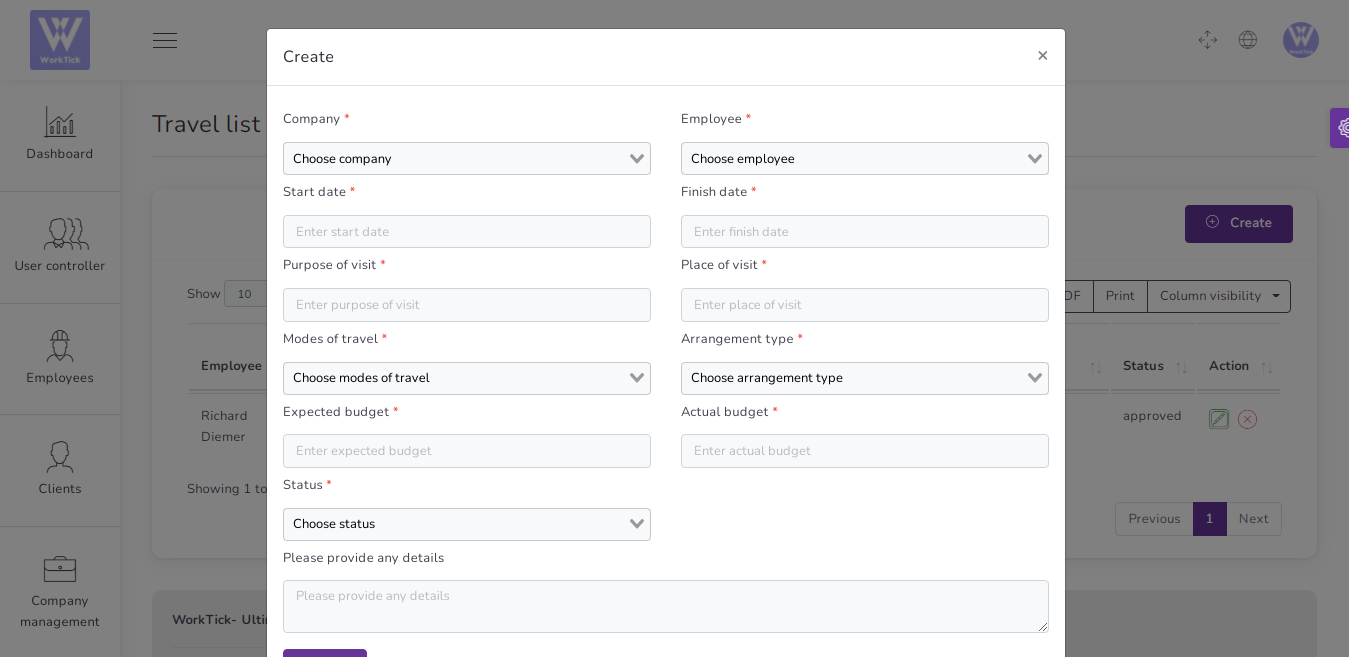
You can manage Travel list
- Edit Travel
- Delete Travel
- Csv ,Excel, pdf, Print Travel
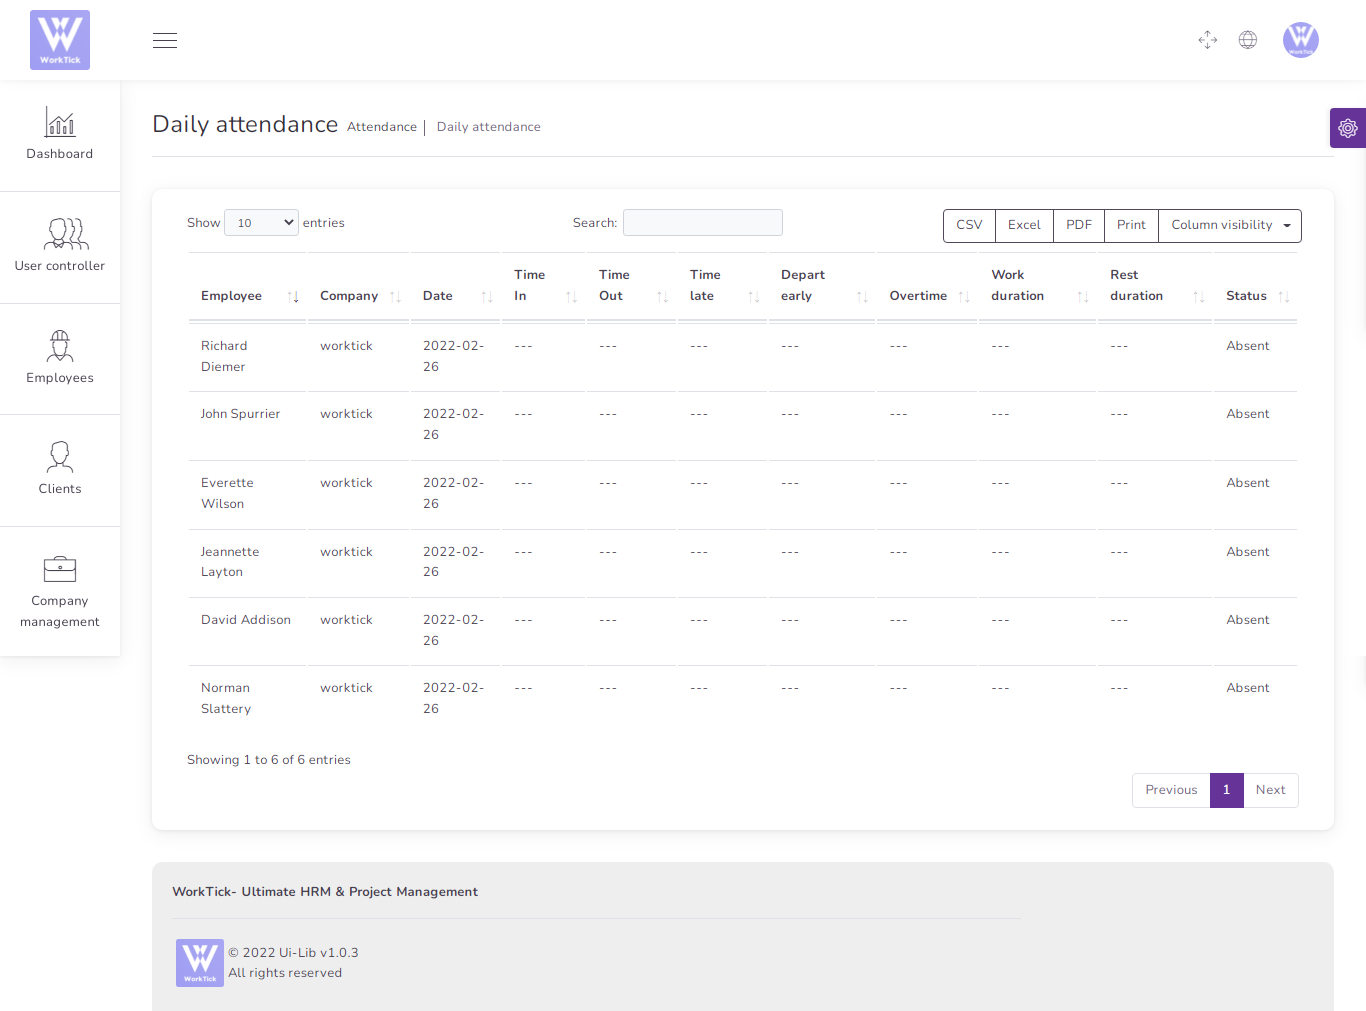
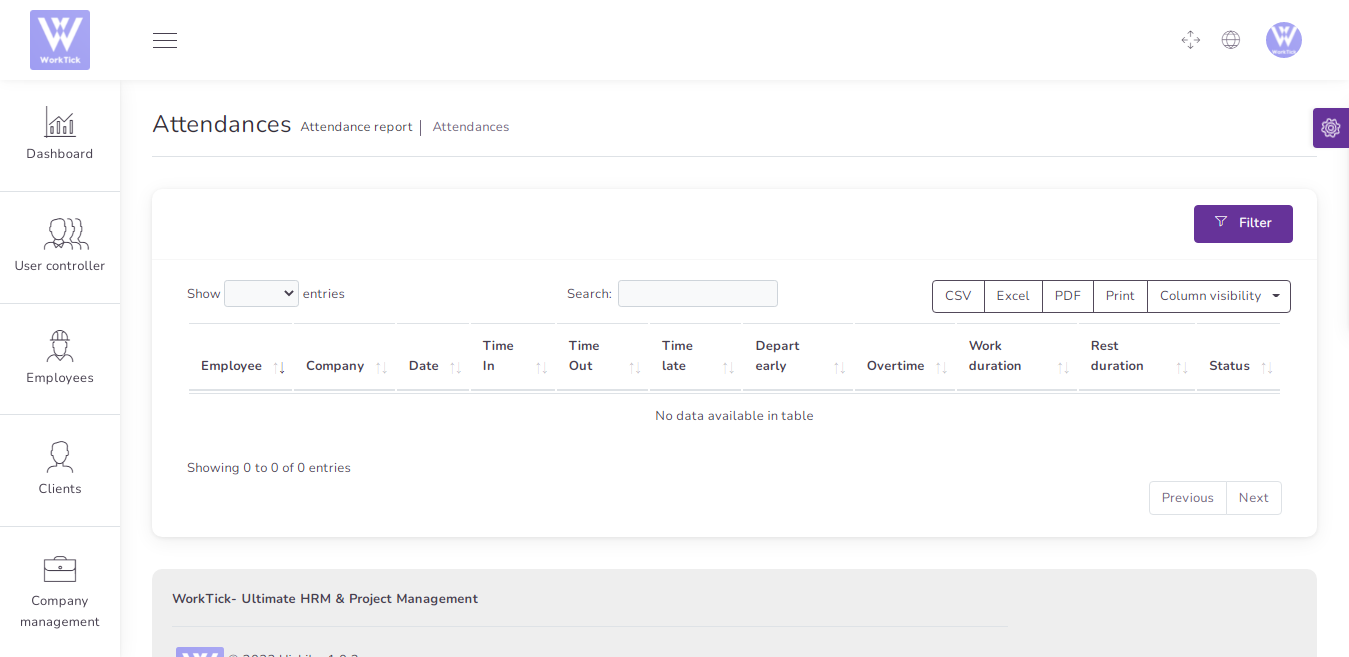
Attendance
You can show all Daily Attendance
- Csv ,Excel, pdf, Print Daily Attendance
Accounting
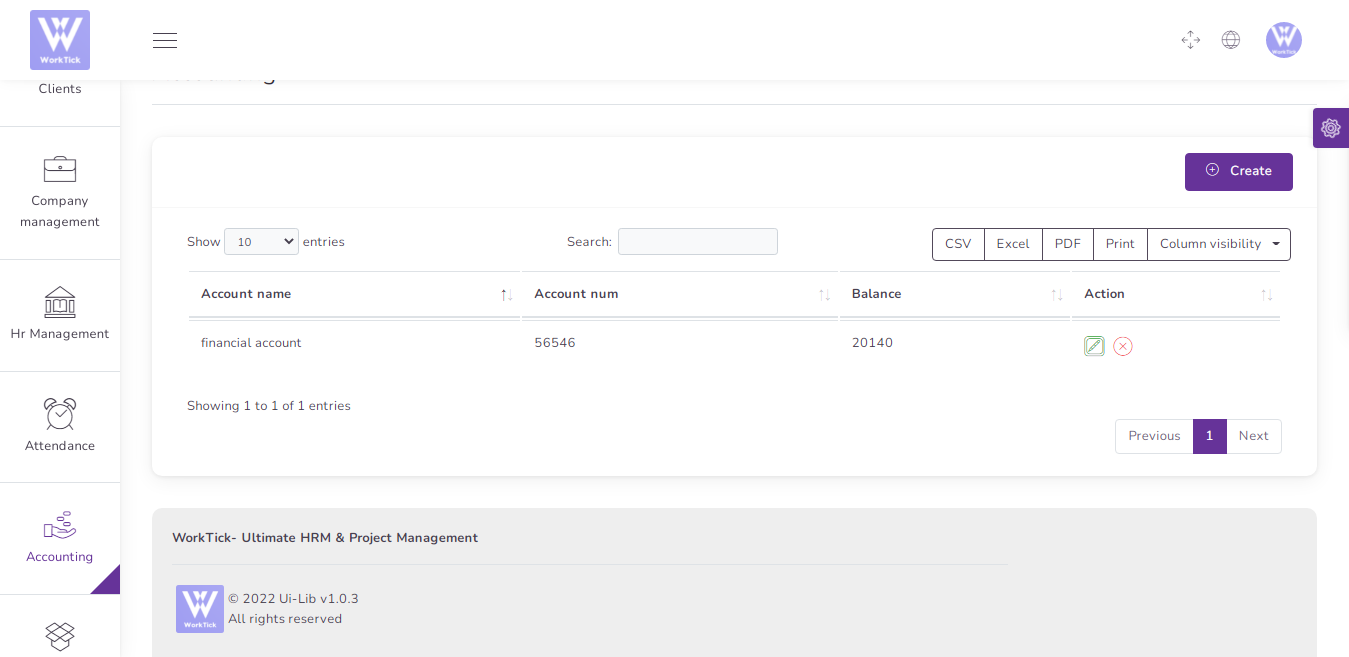
1) Account
to create a new Account it's very easy
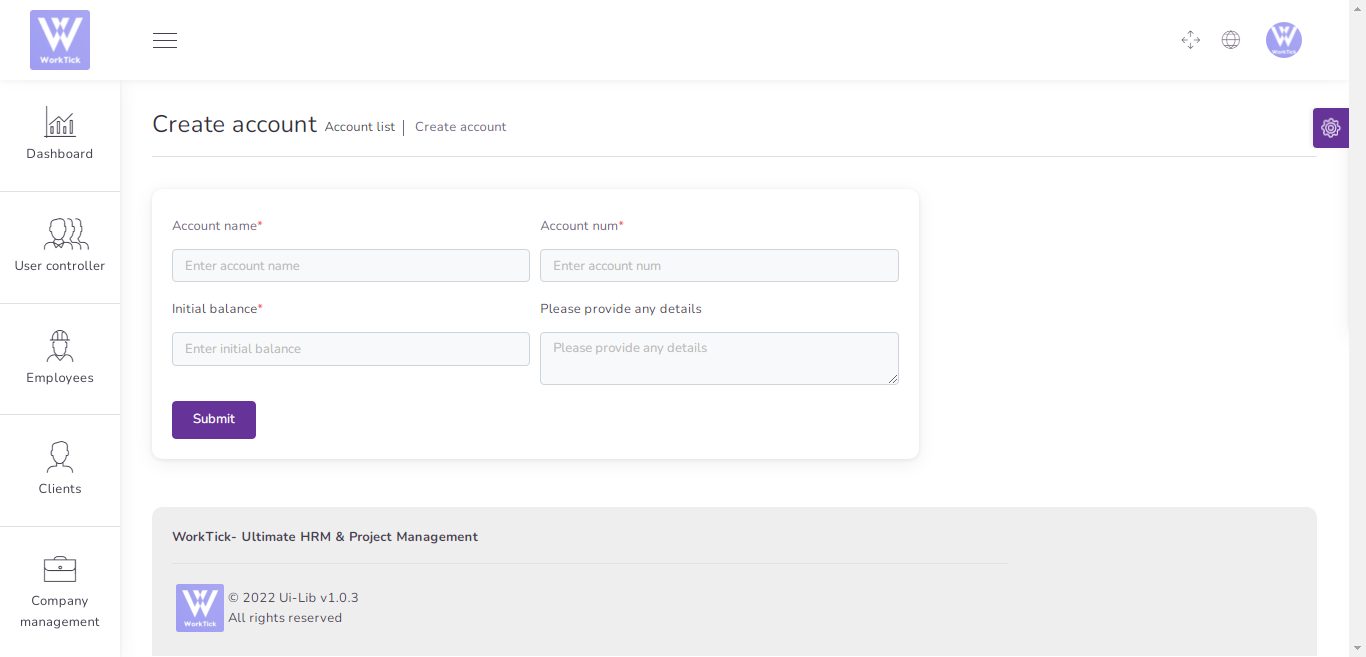
You can manage all Account
- Edit Account
- Delete Account
- Csv ,Excel, pdf, Print Account
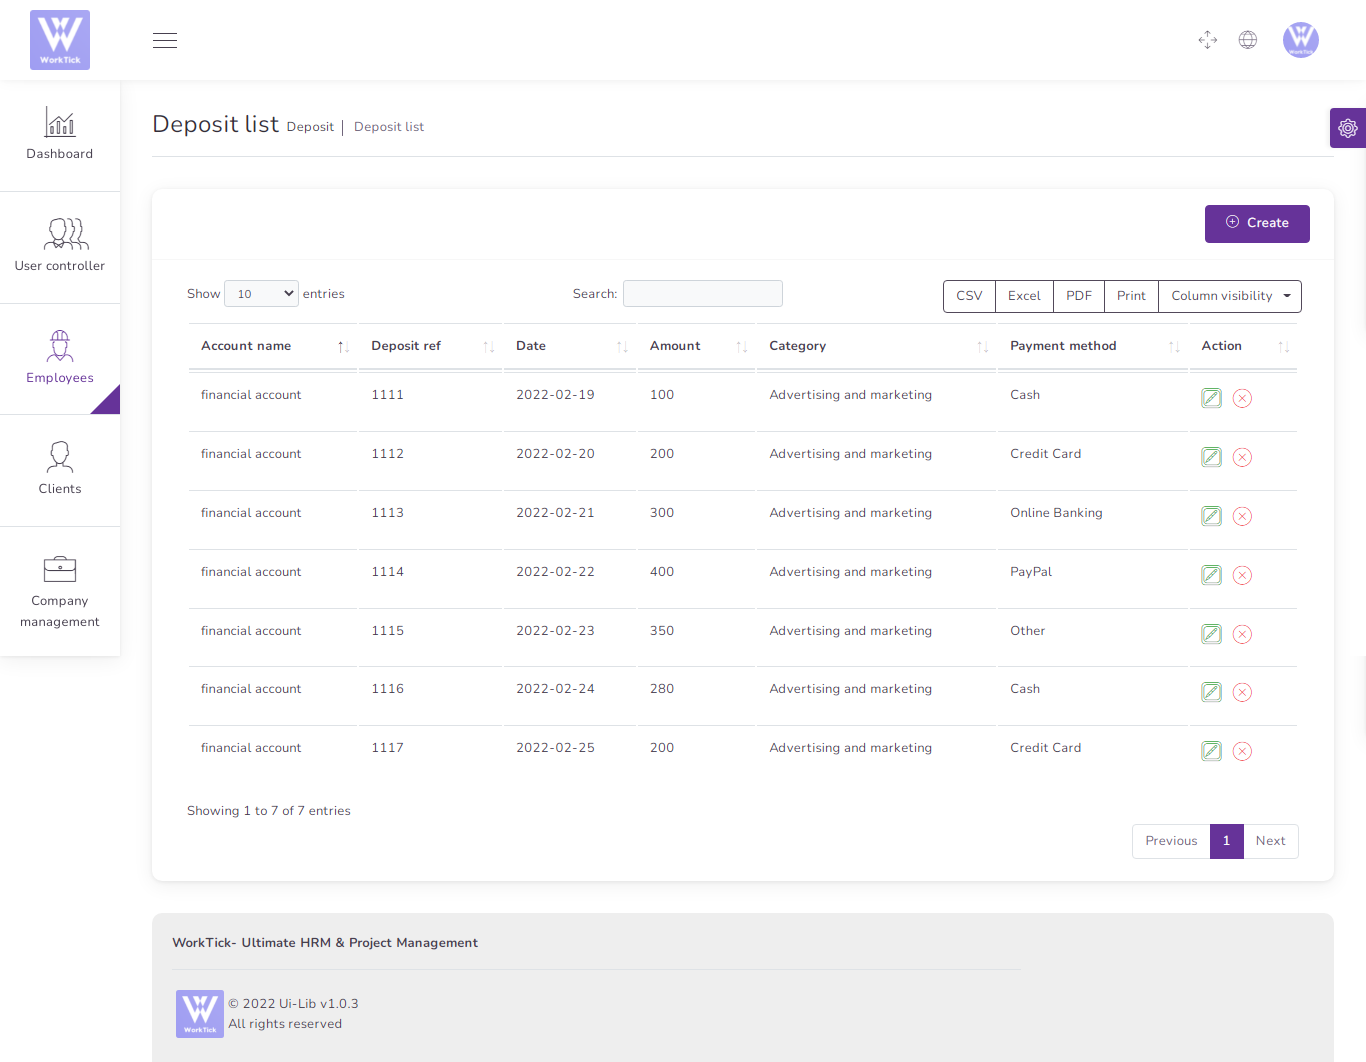
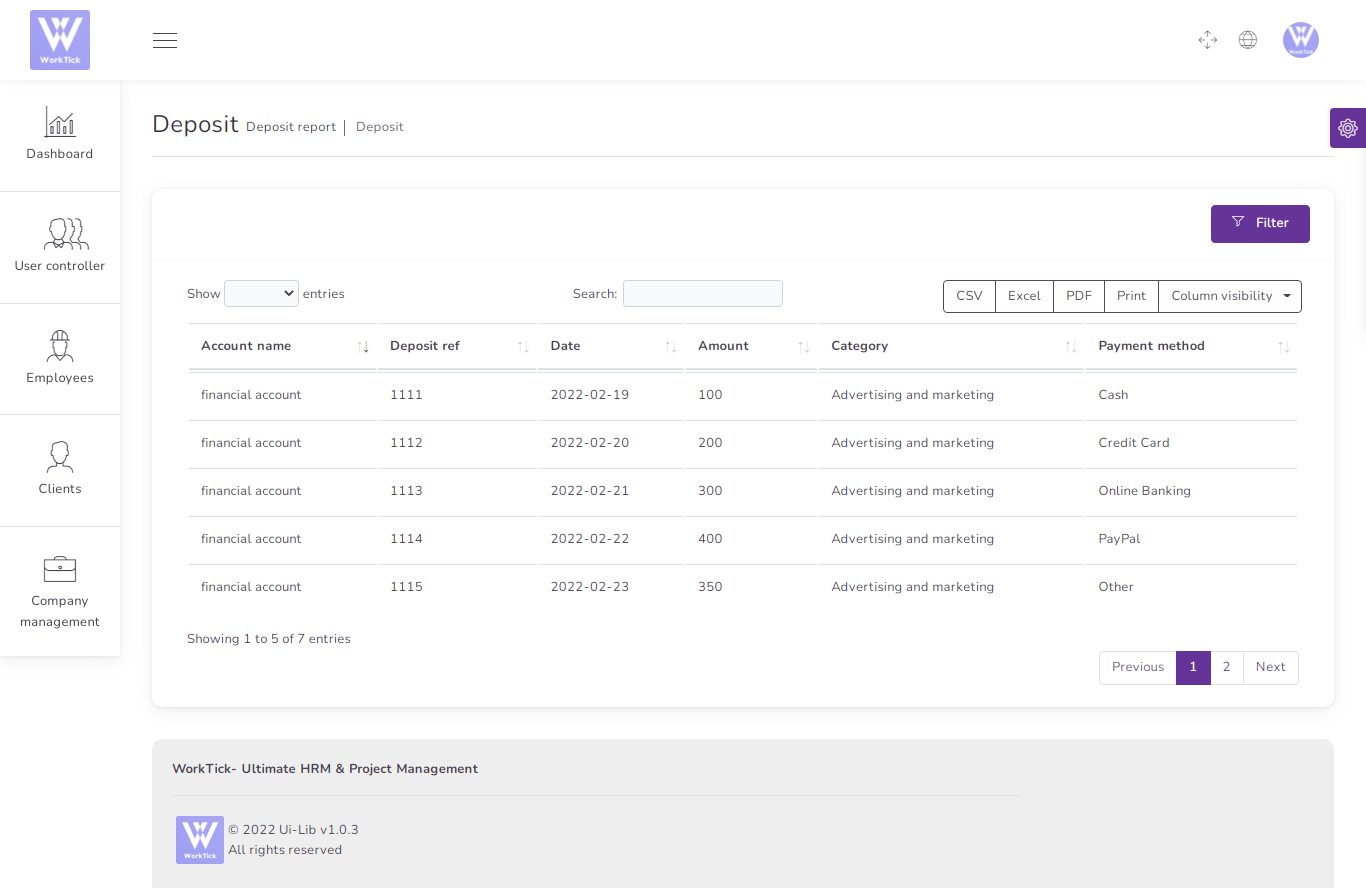
2) Deposit
to create a new Deposit it's very easy
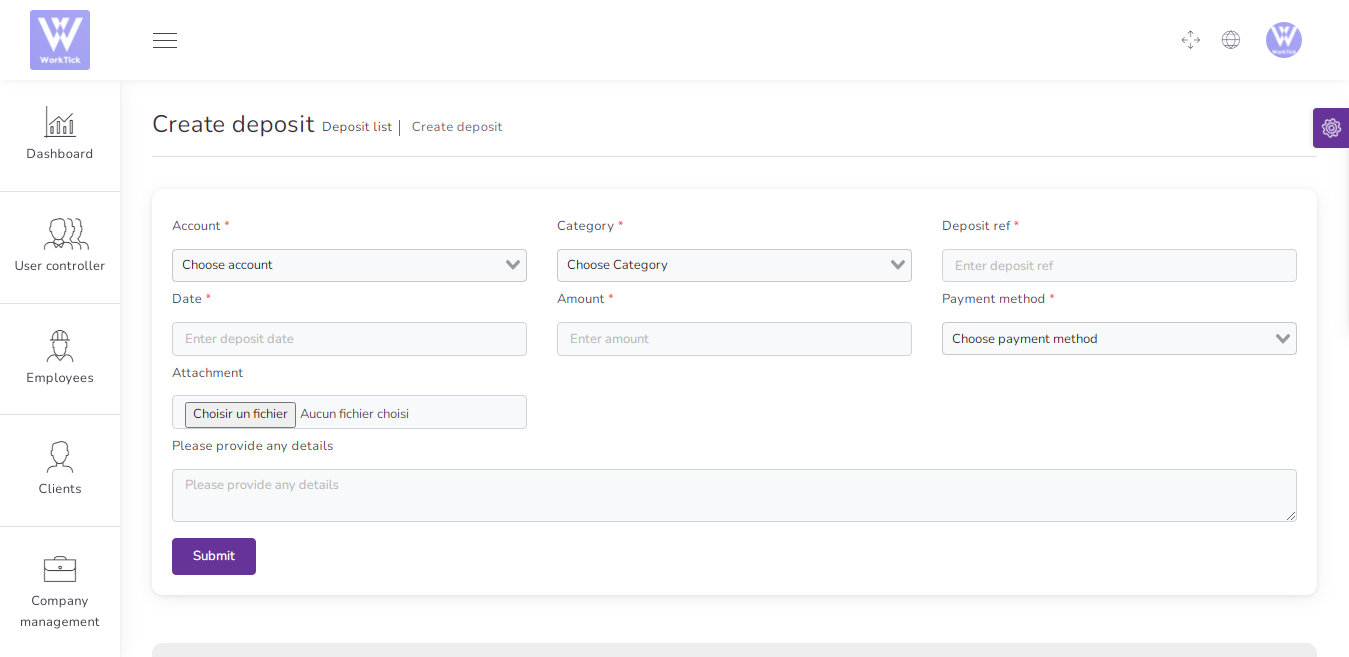
You can manage all Deposit
- Edit Deposit
- Delete Deposit
- Csv ,Excel, pdf, Print Deposit
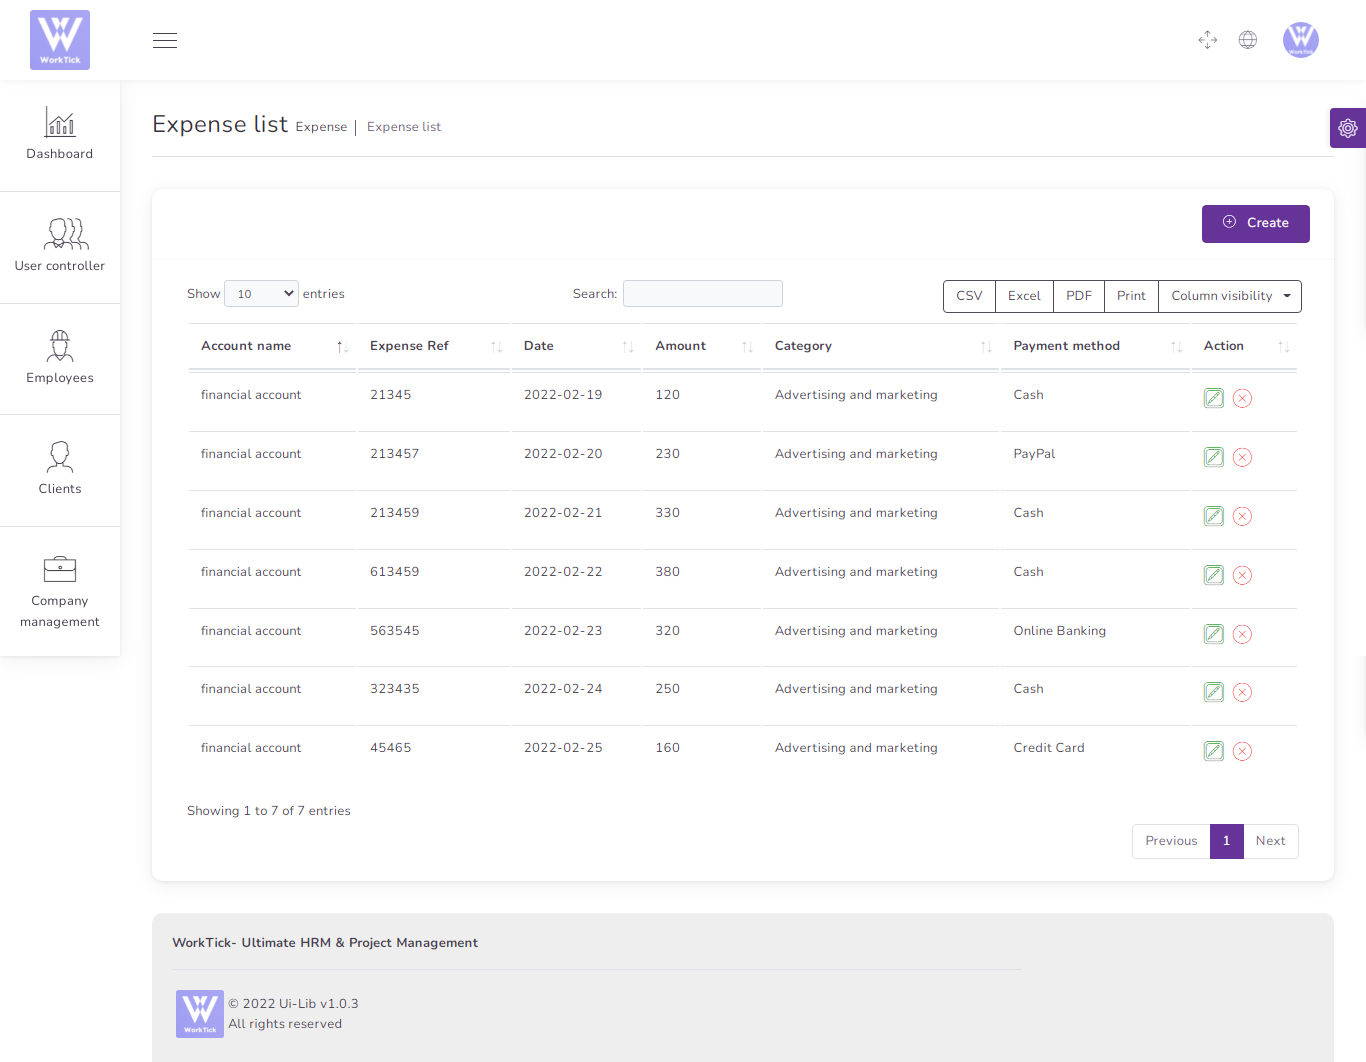
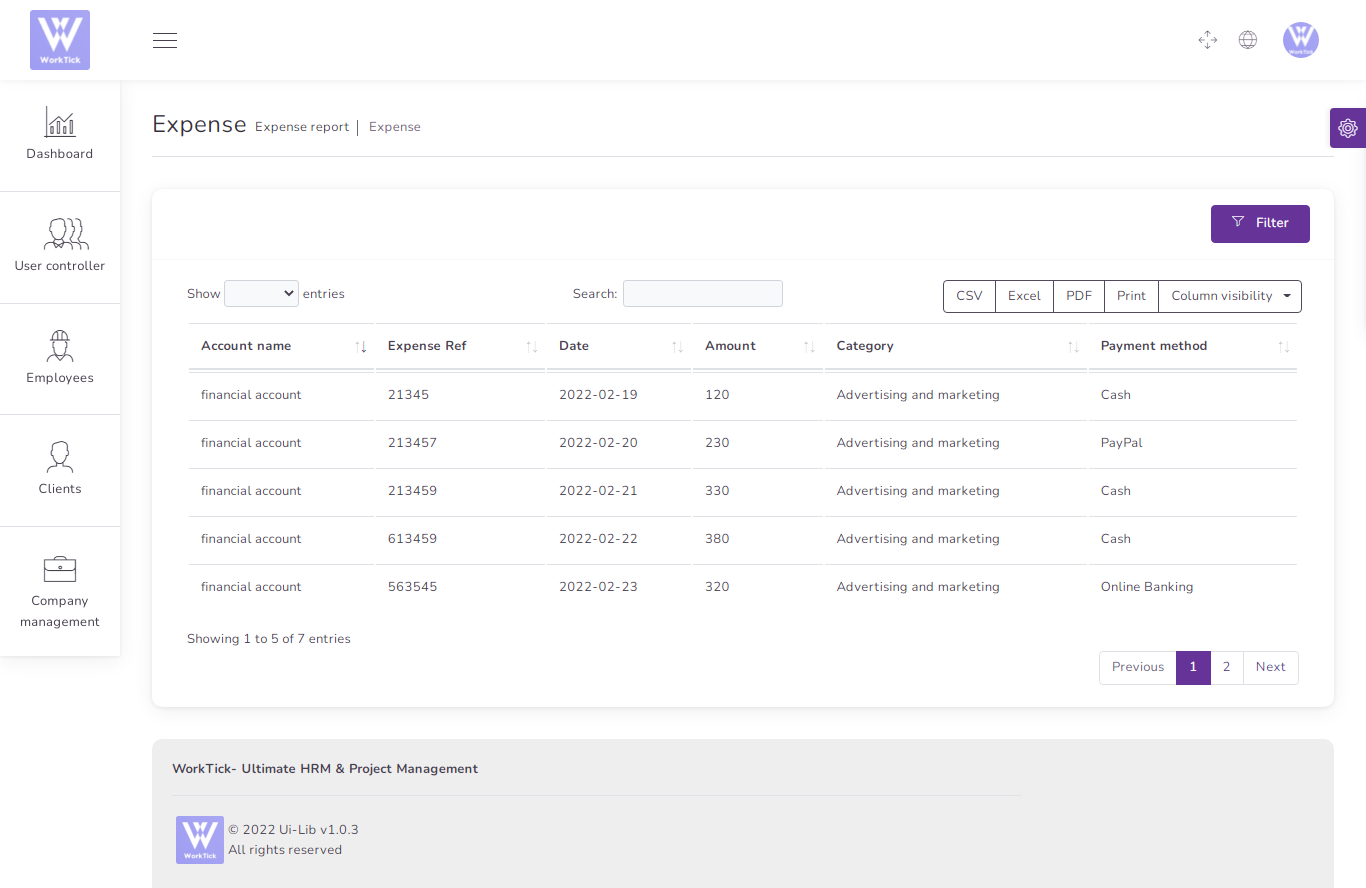
3) Expense
to create a new expense it's very easy

You can manage all expense
- Edit expense
- Delete expense
- Csv ,Excel, pdf, Print expense
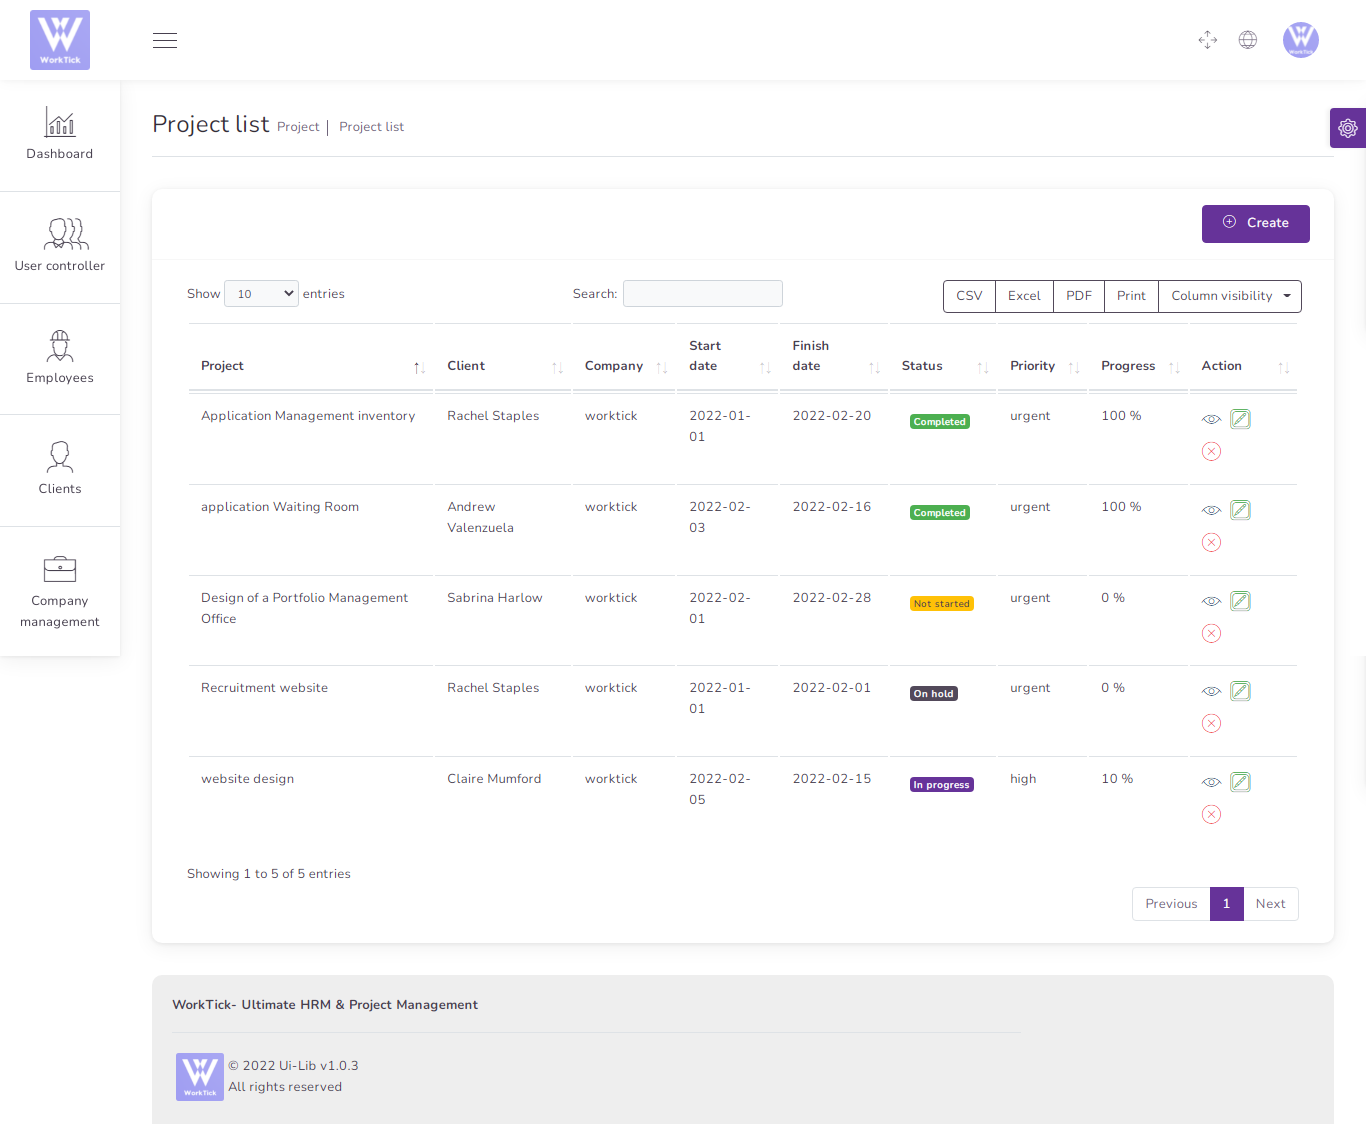
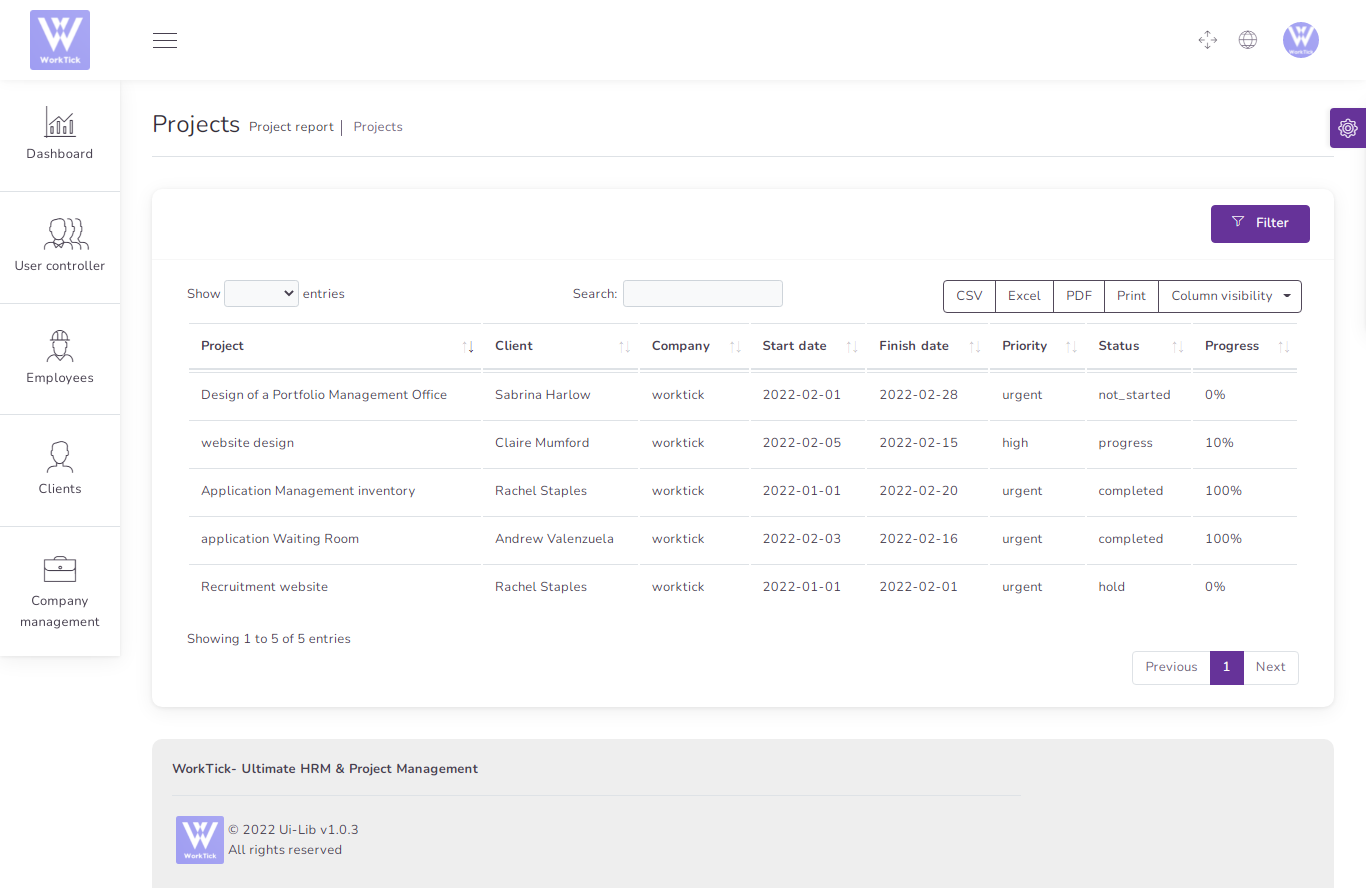
Project
to create a new Project it's very easy
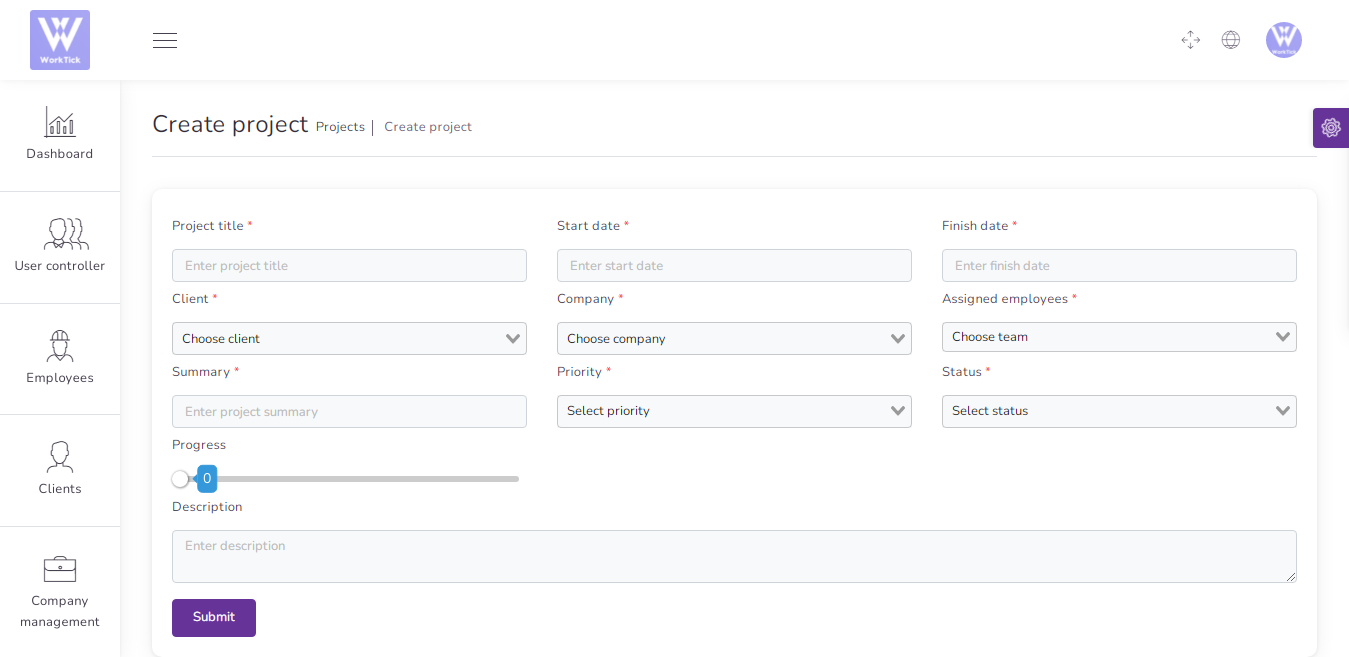
You can manage Project list
- Edit Project
- details Project
- Delete Project
- Csv ,Excel, pdf, Print Project
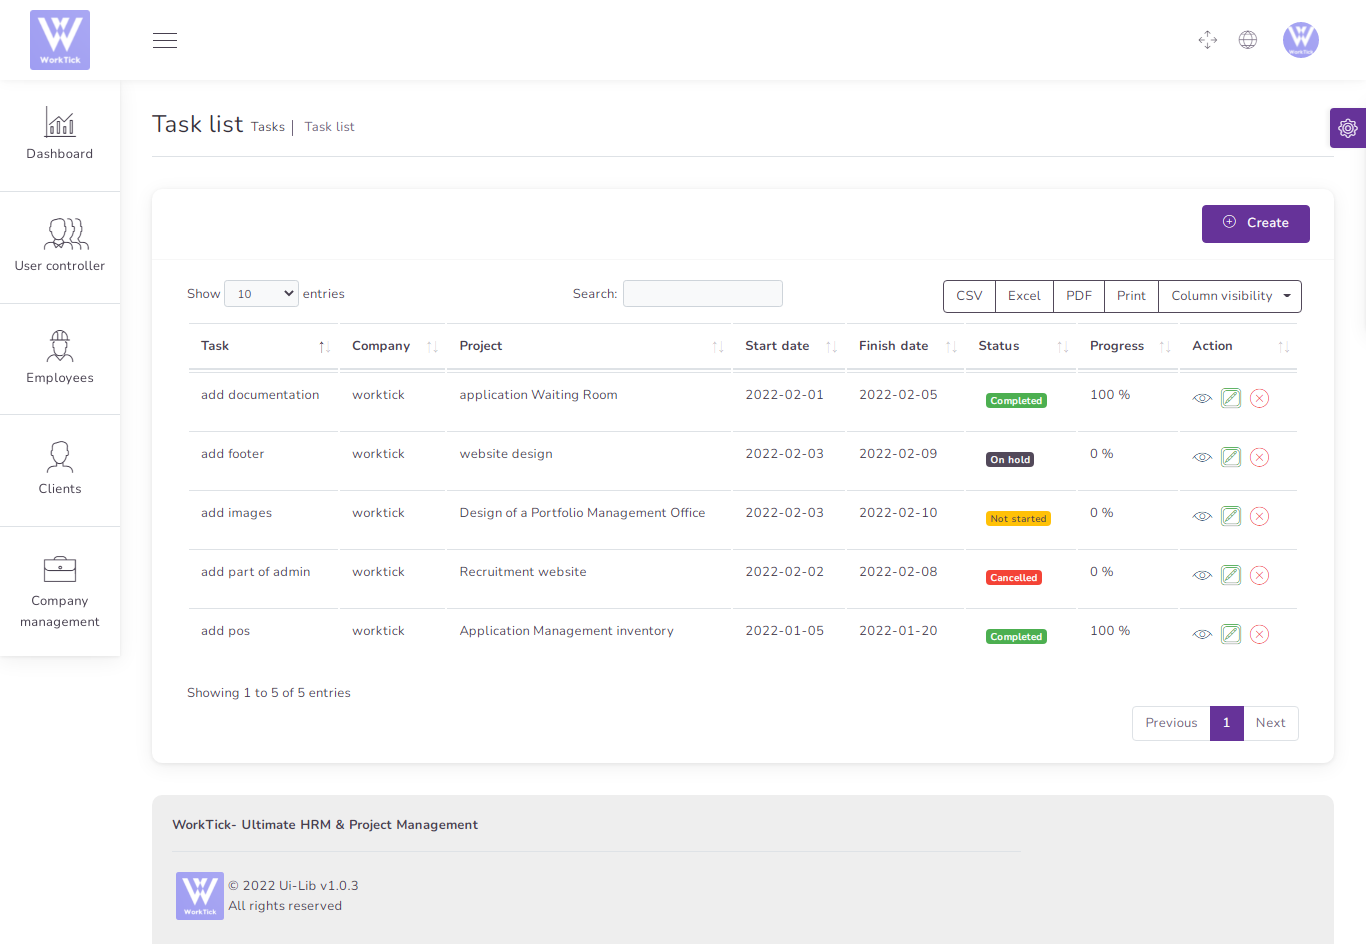
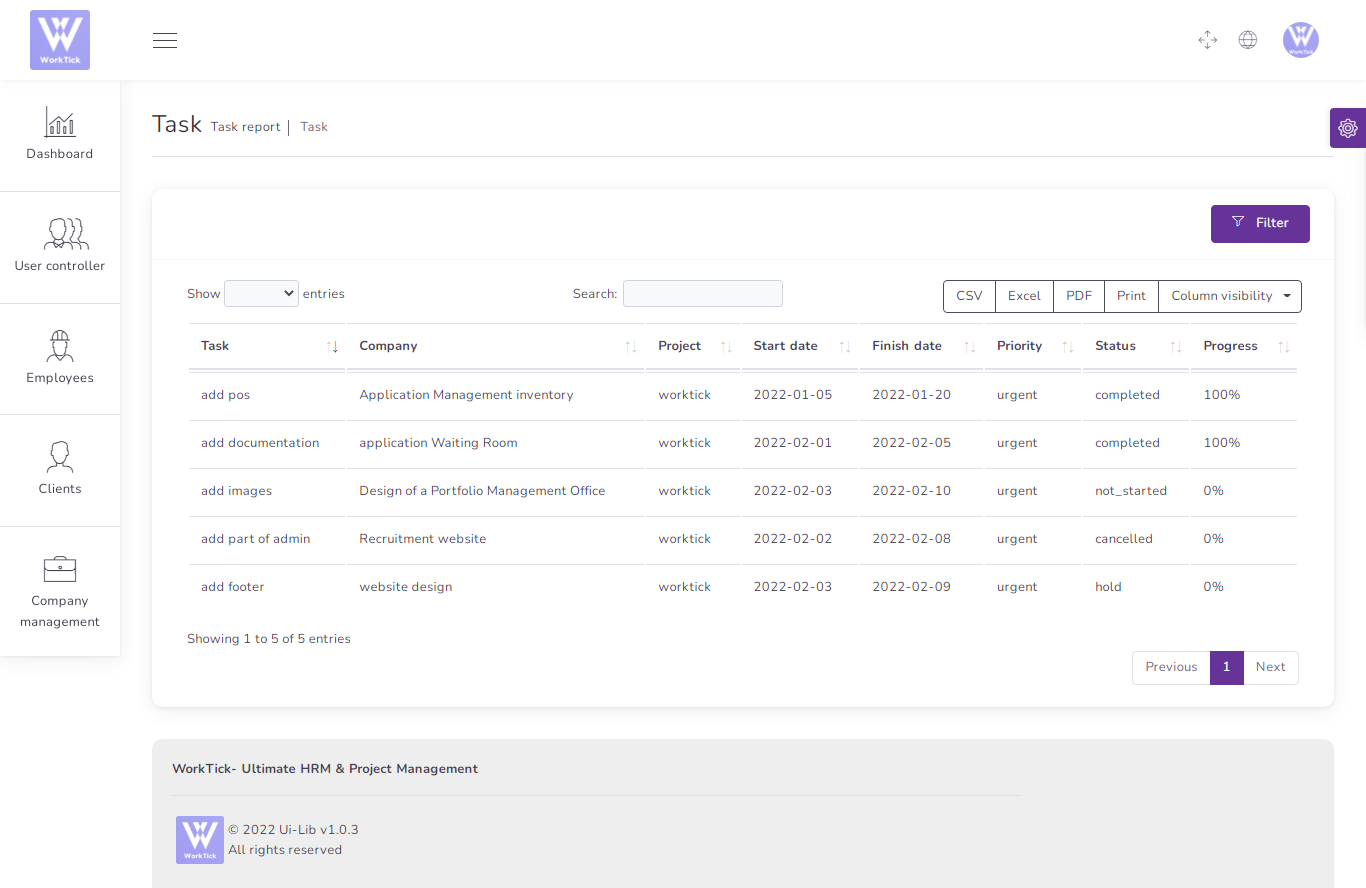
Task
to create a new Task it's very easy
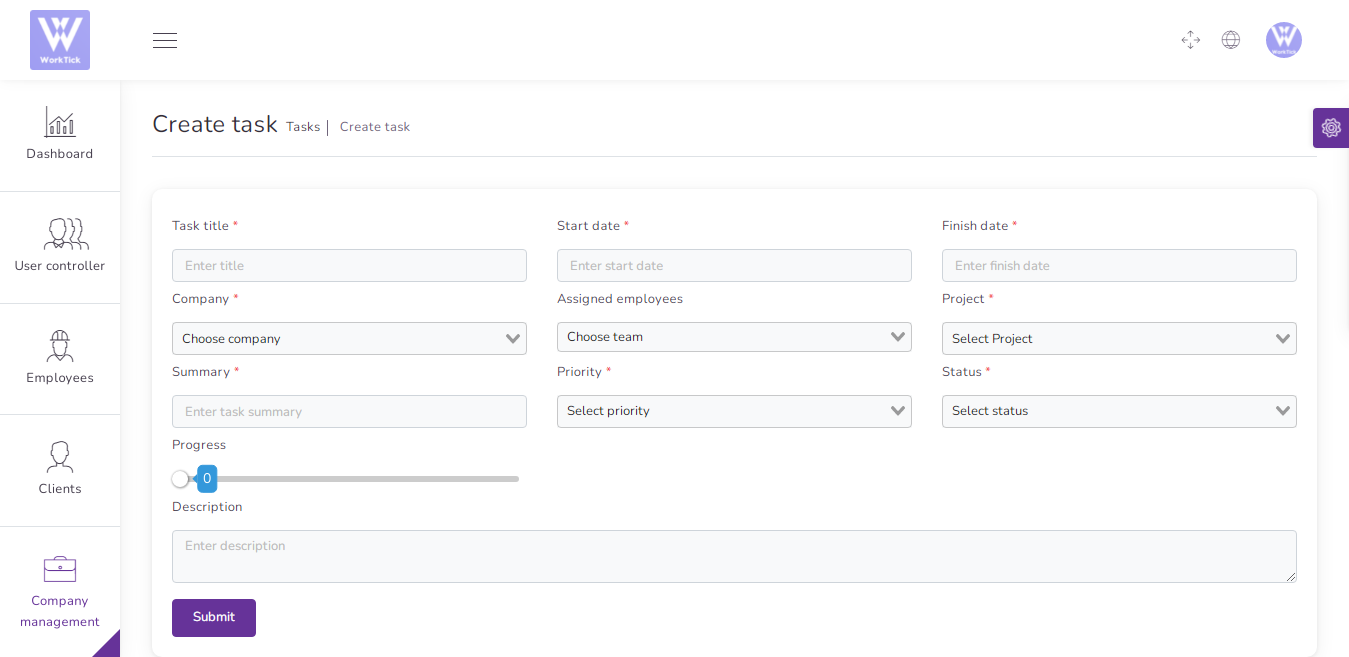
You can manage Task list
- Edit Task
- details Task
- Delete Task
- Csv ,Excel, pdf, Print Task
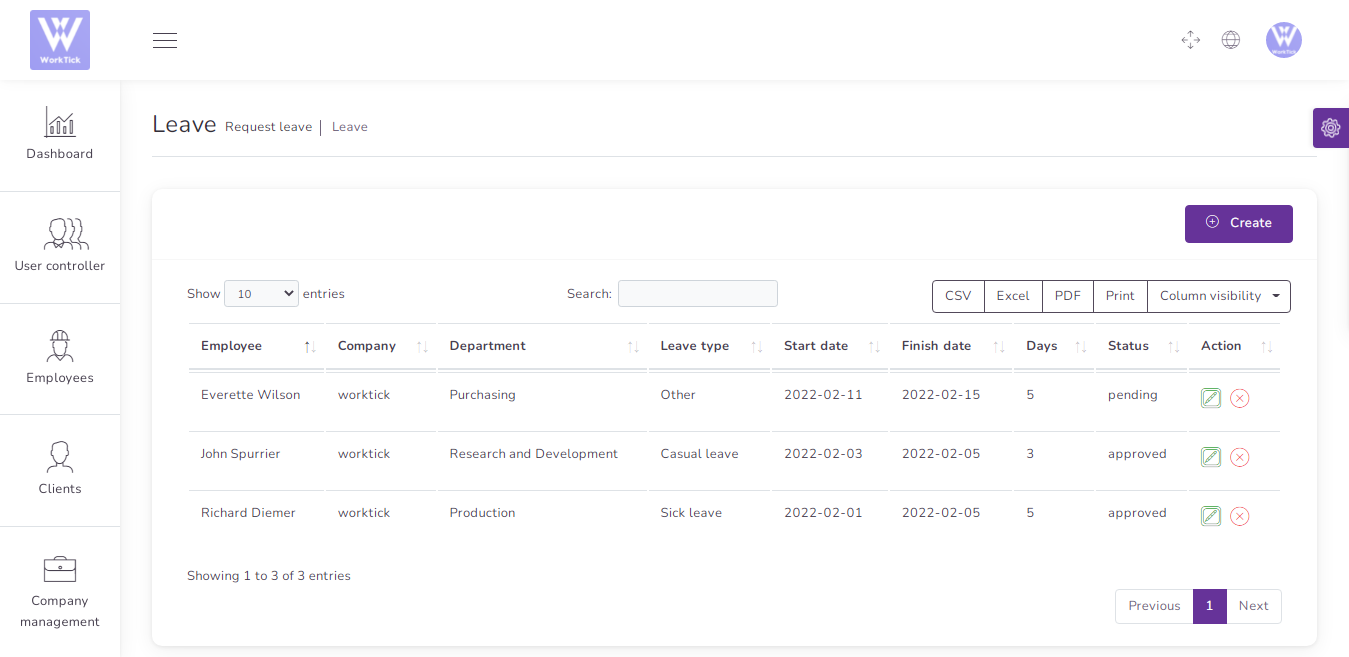
Leave
to create a new Leave it's very easy
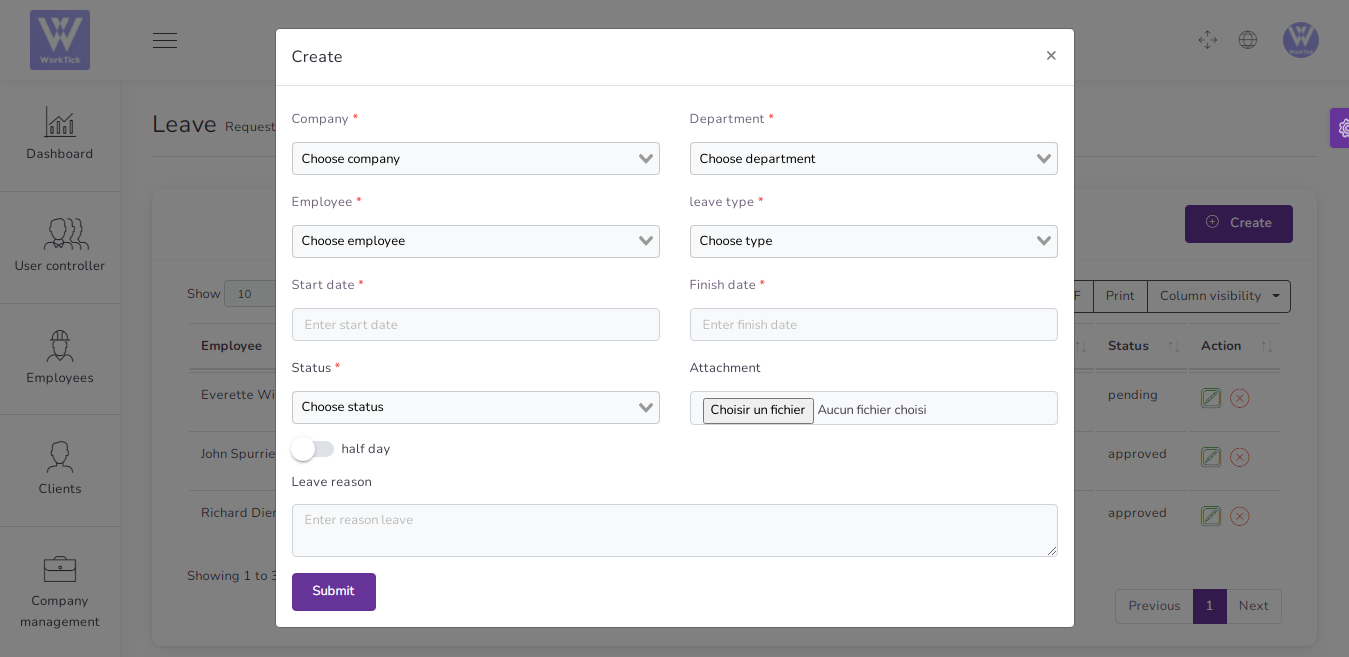
You can manage Leave list
- Edit Leave
- Delete Leave
- Csv ,Excel, pdf, Print Leave
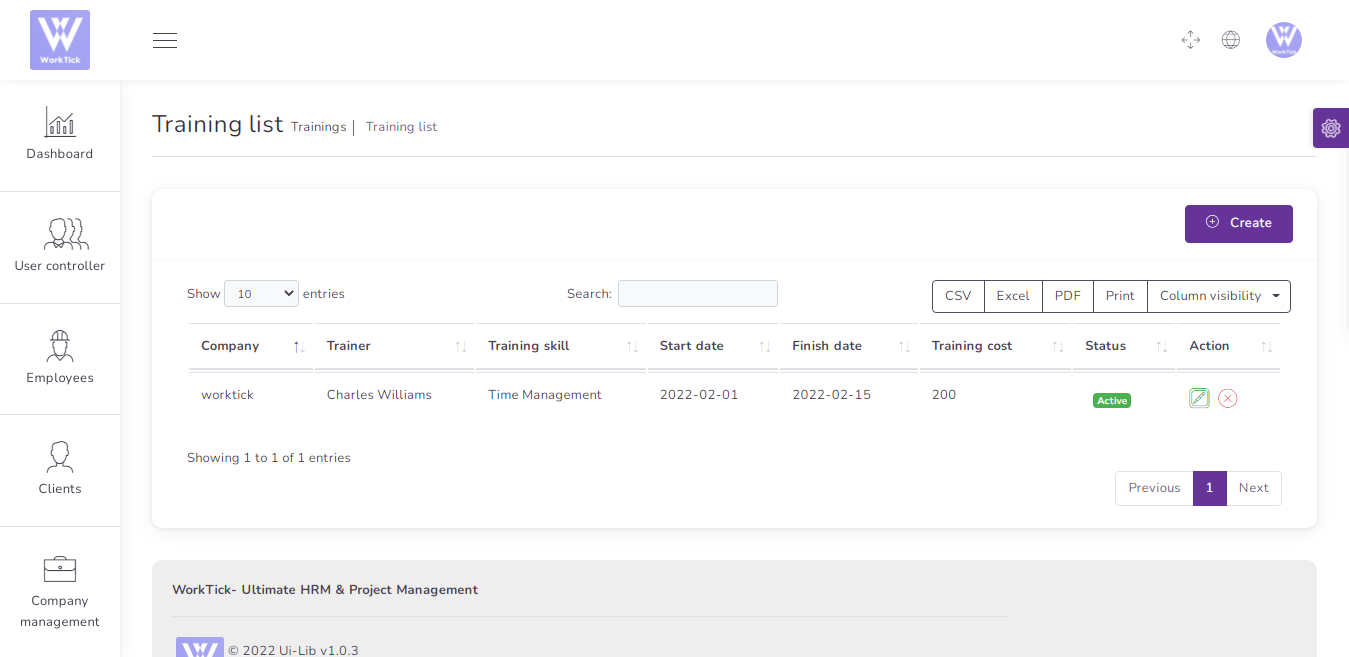
Training
to create a new Training it's very easy
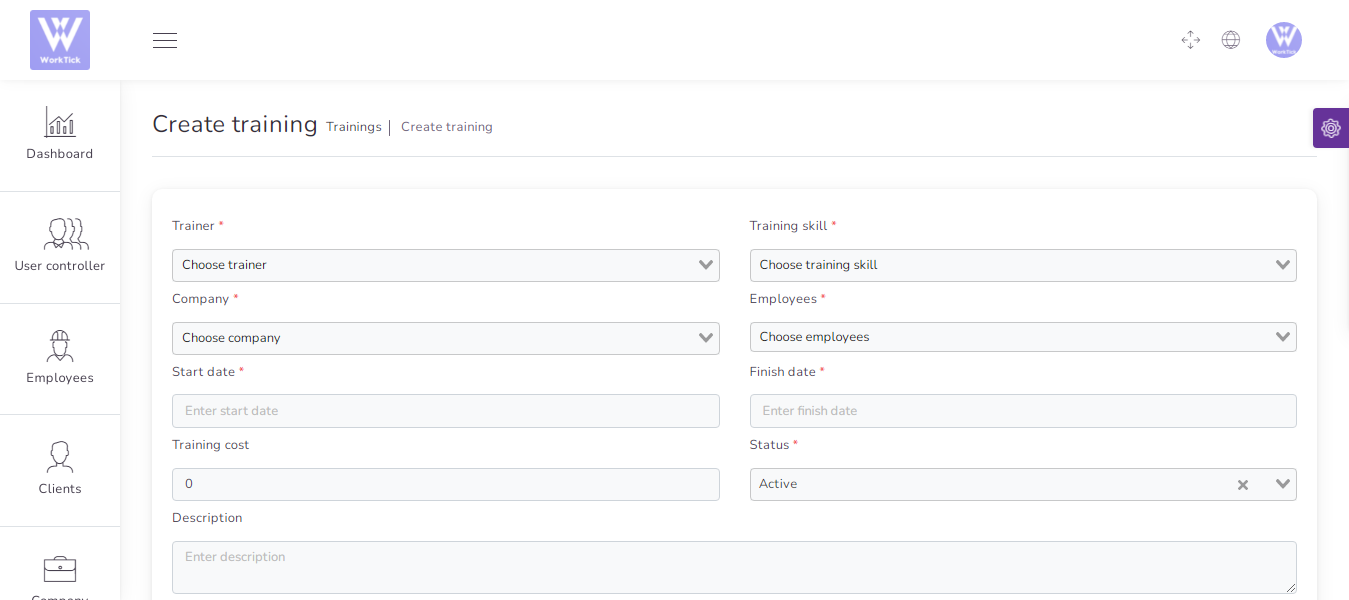
You can manage Training list
- Edit Training
- Delete Training
- Csv ,Excel, pdf, Print Training
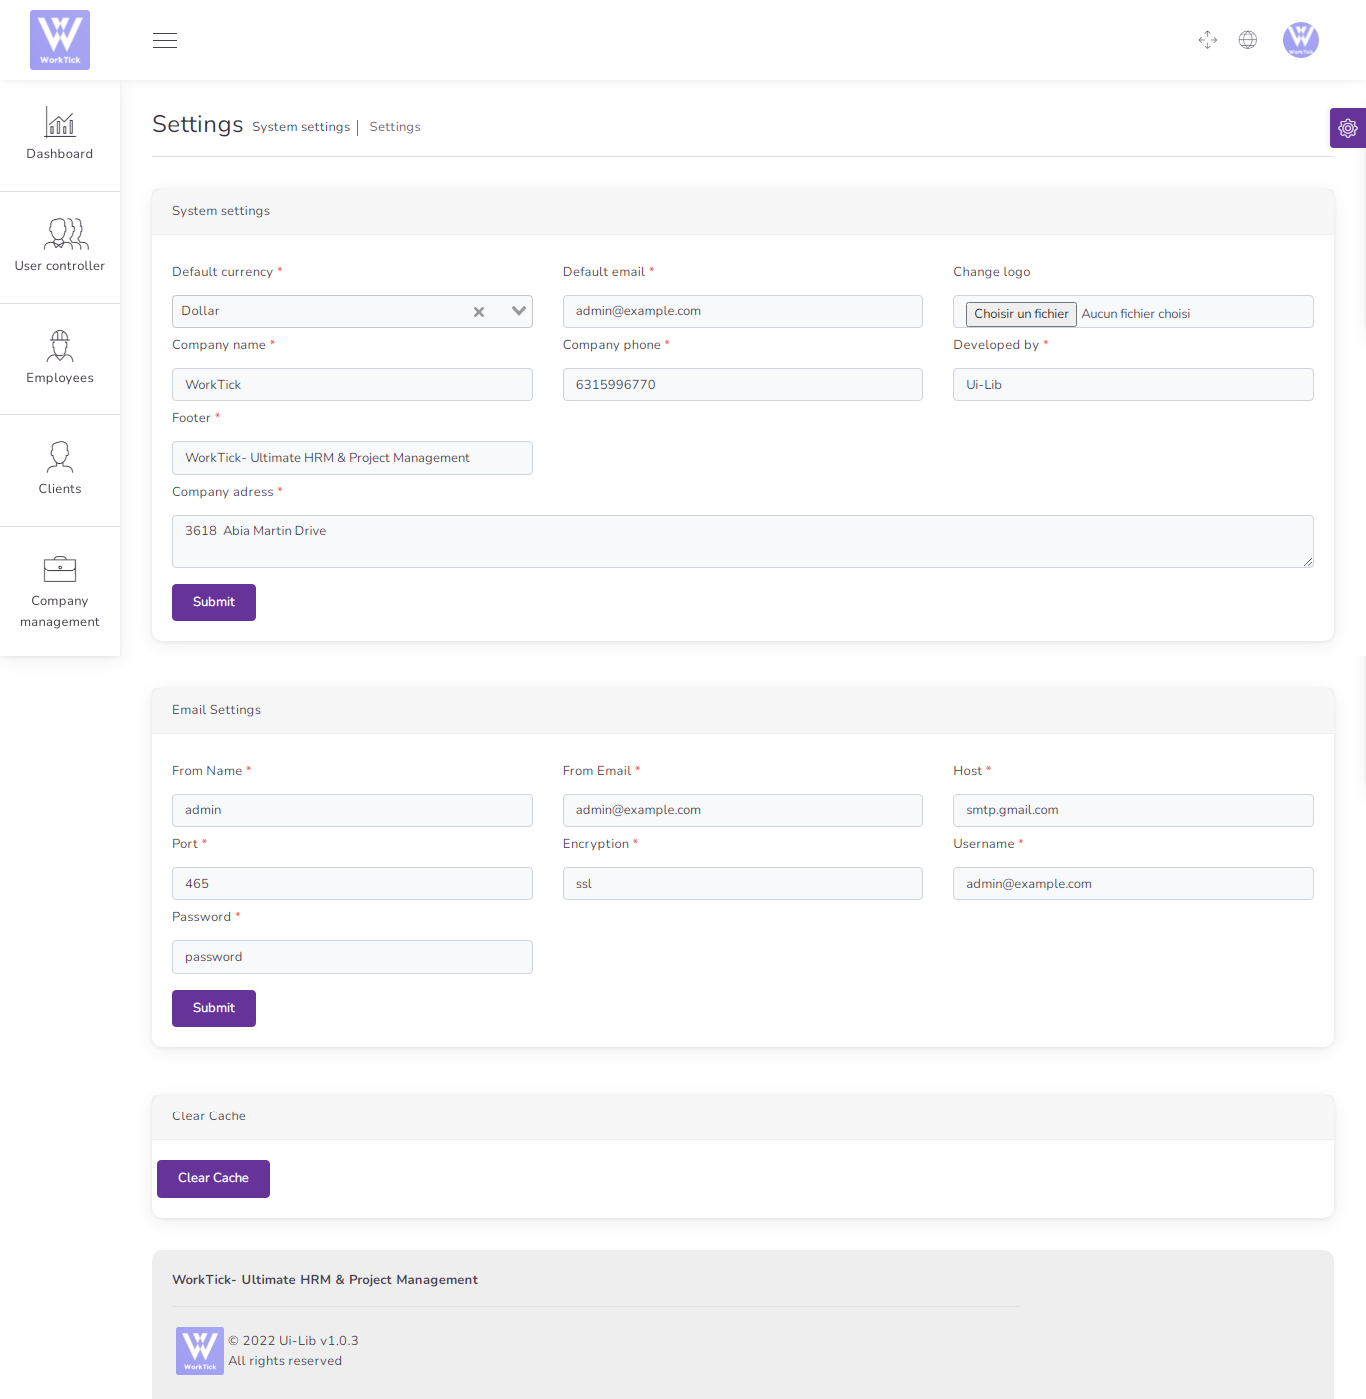
Settings
System Setting
You can edit your company settings & email settings & clear cache
Host : Host smtp mail server
Port : 25 or 587 or 465 or 2525)
username : your username smtp mail server
password : your password smtp mail server
Encryption : tls or ssl
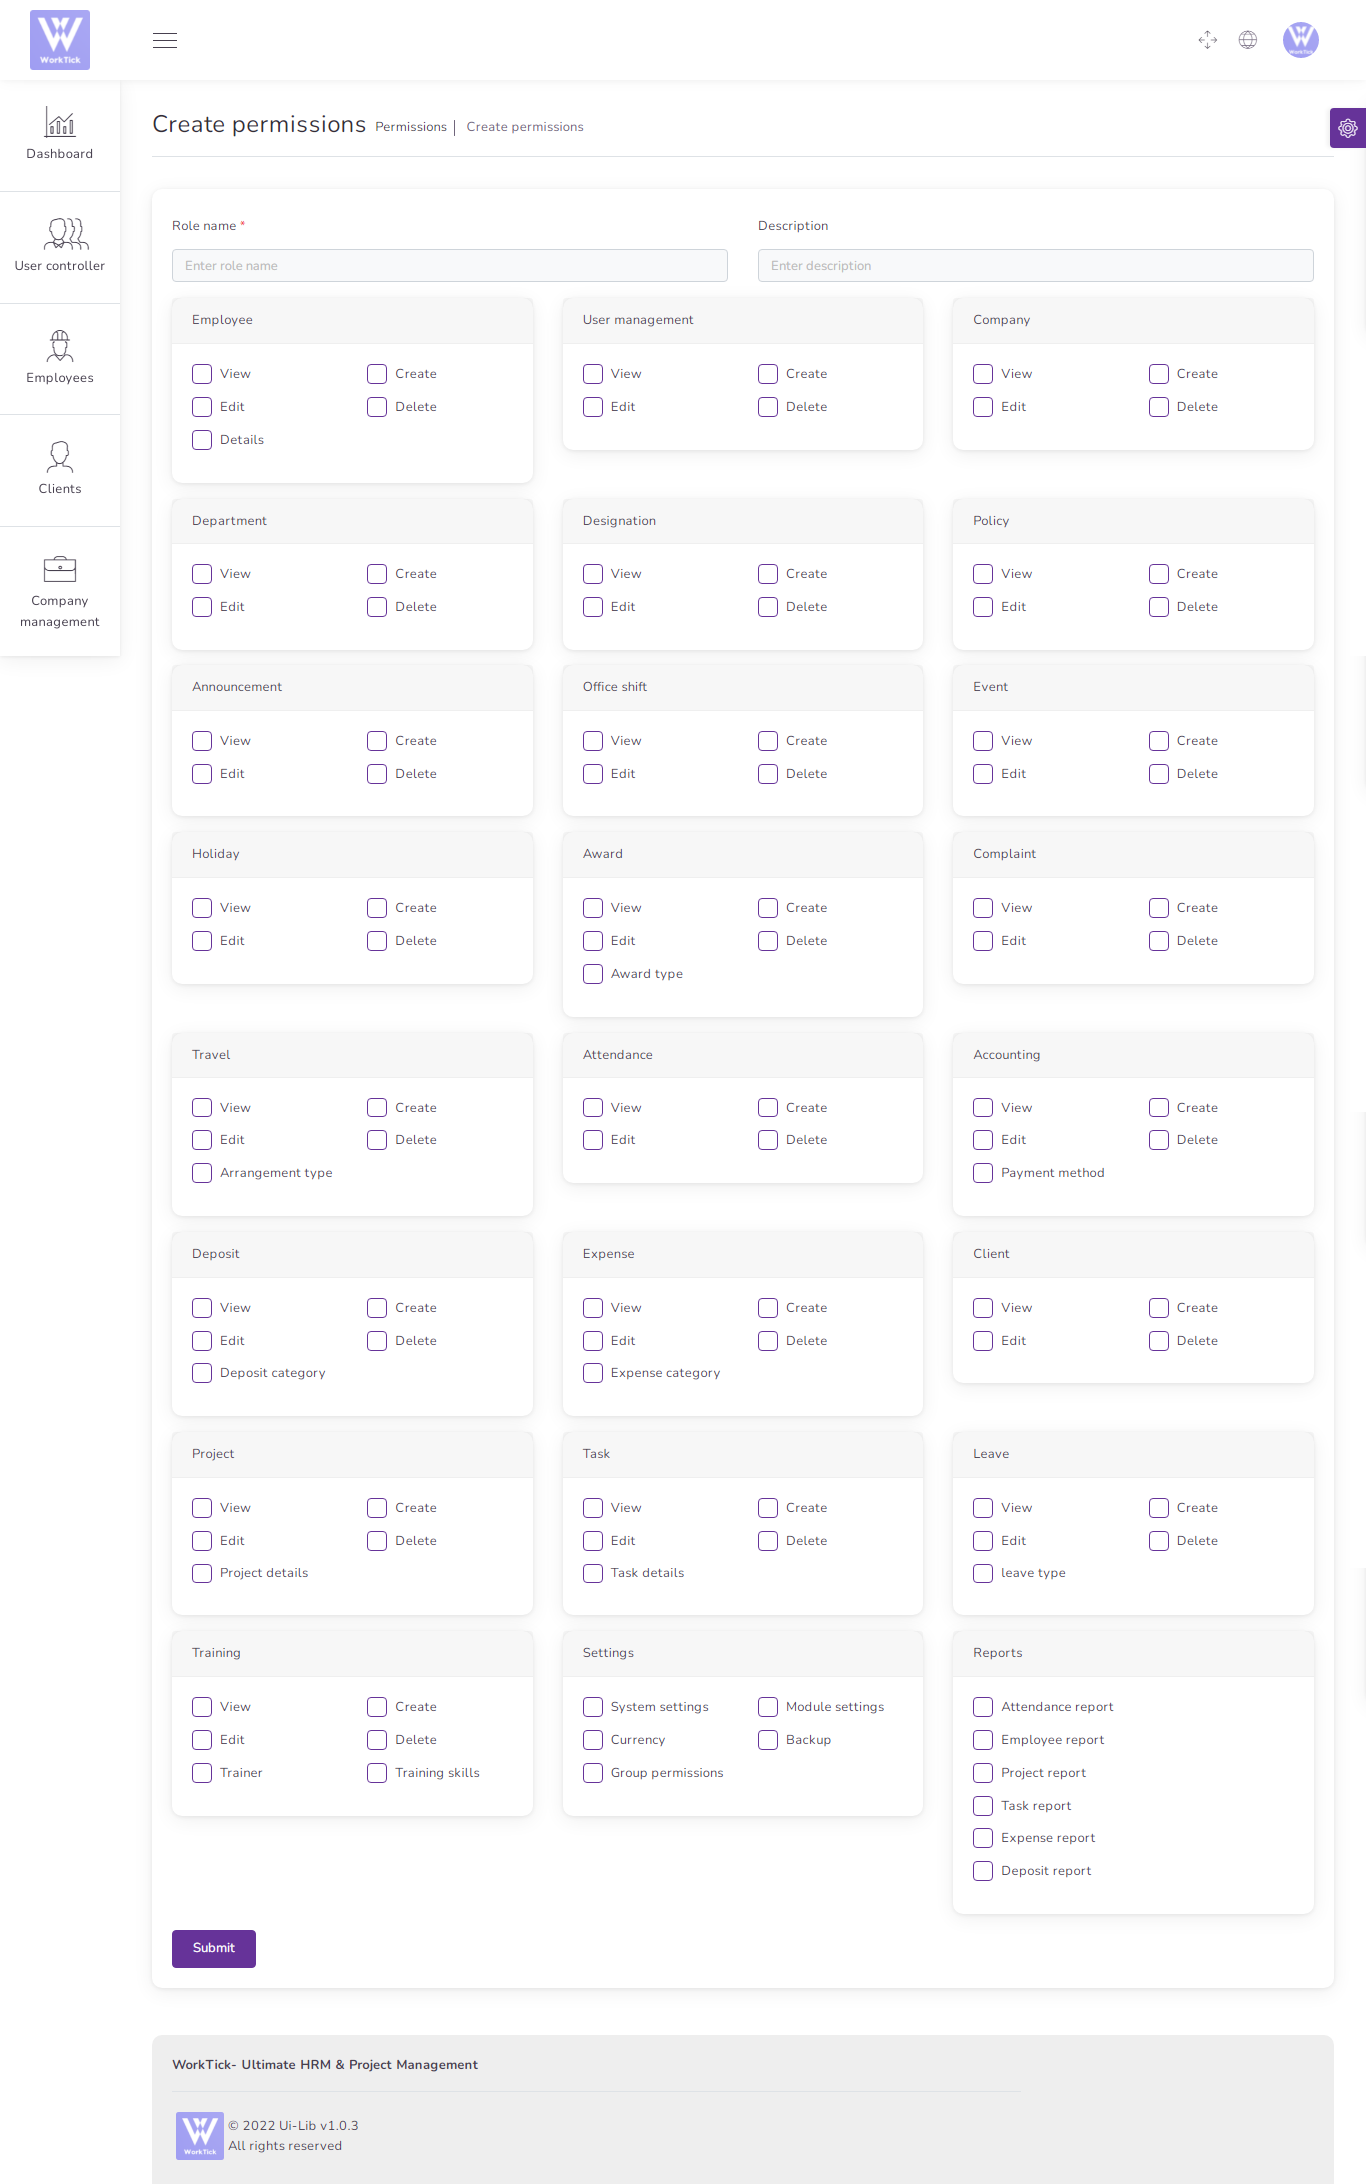
Permissions
More Than 110 Permissions
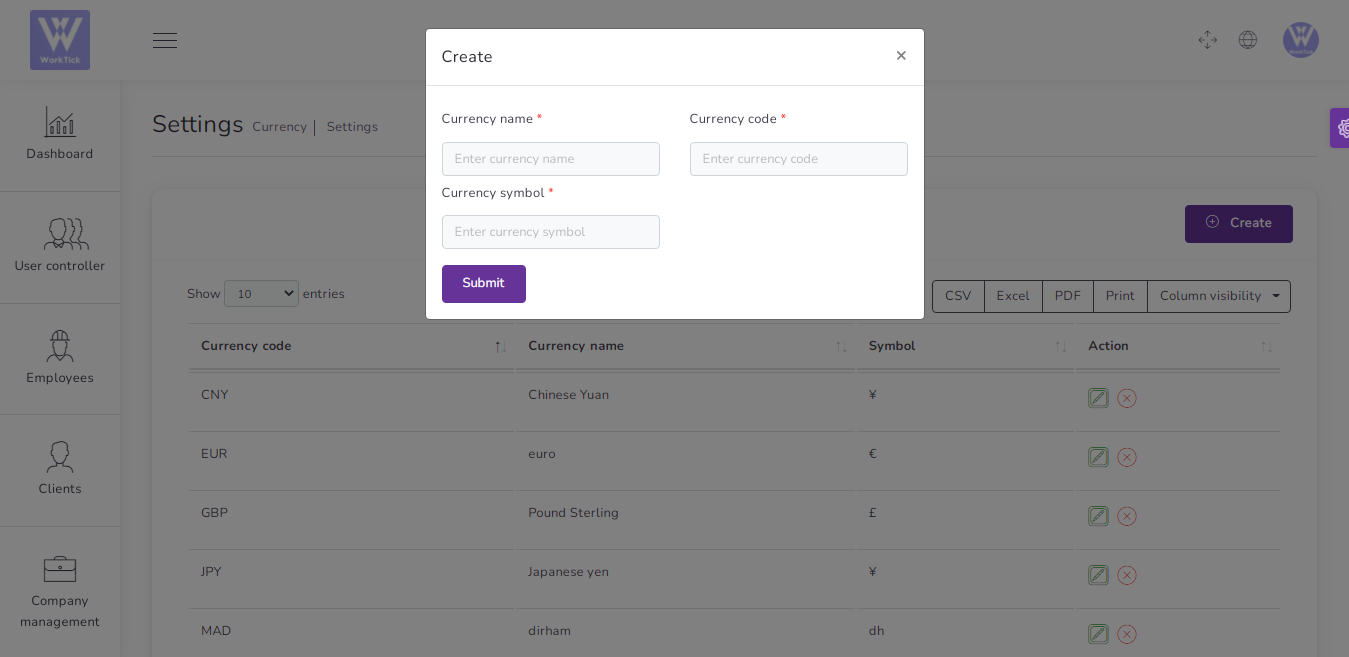
You can manage Currency list
- Edit Currency
- Delete Currency
- Search Currency
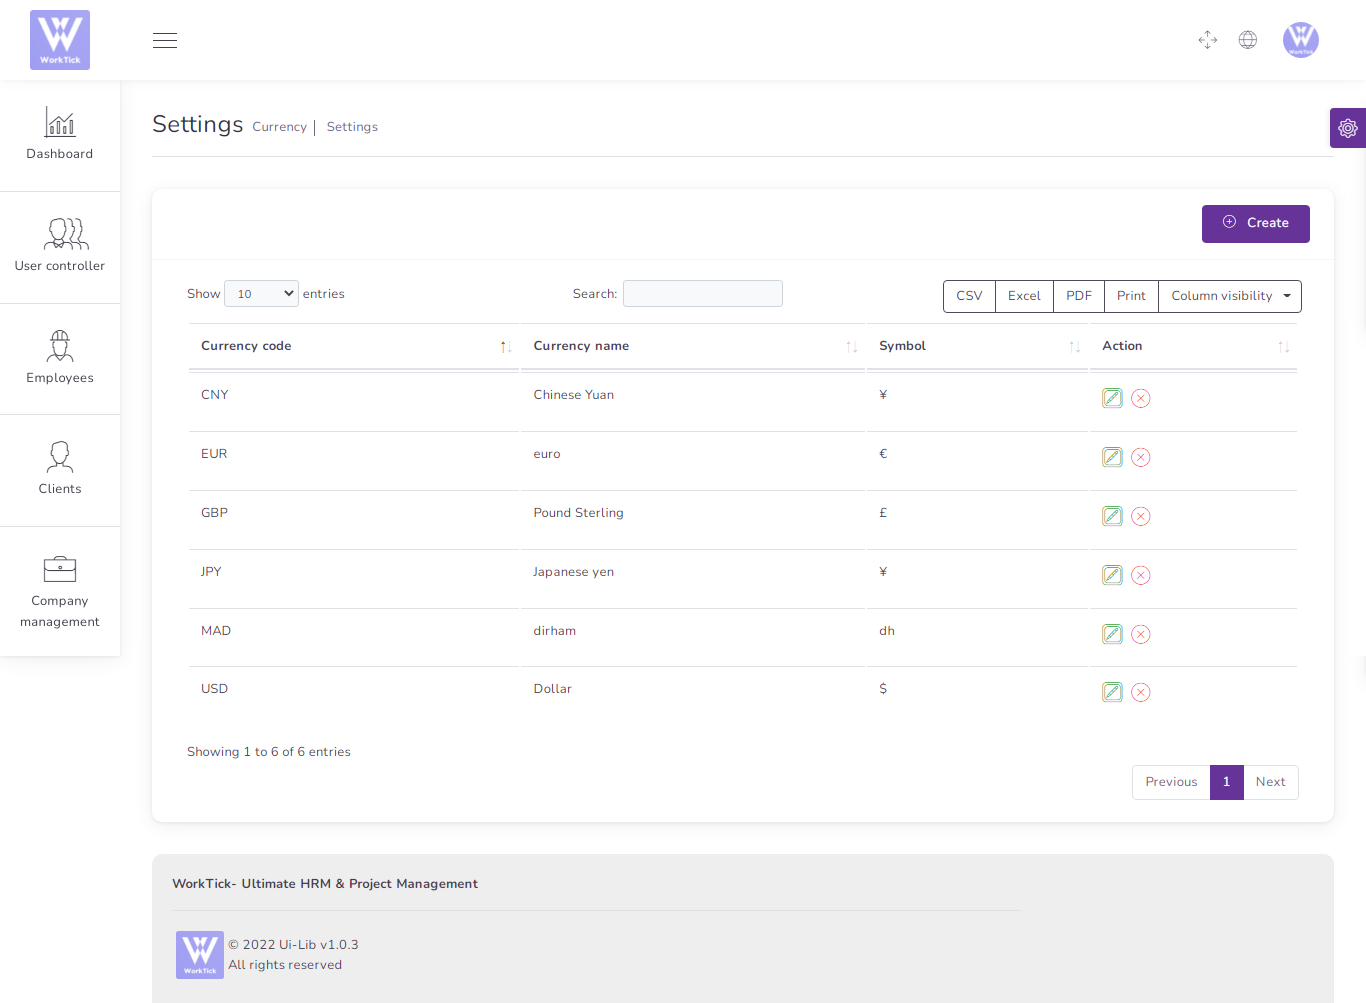
Create new Currency
No Live Exchange Just Symbol
- Code
(required) - Name
(required) - Symbol
(required)
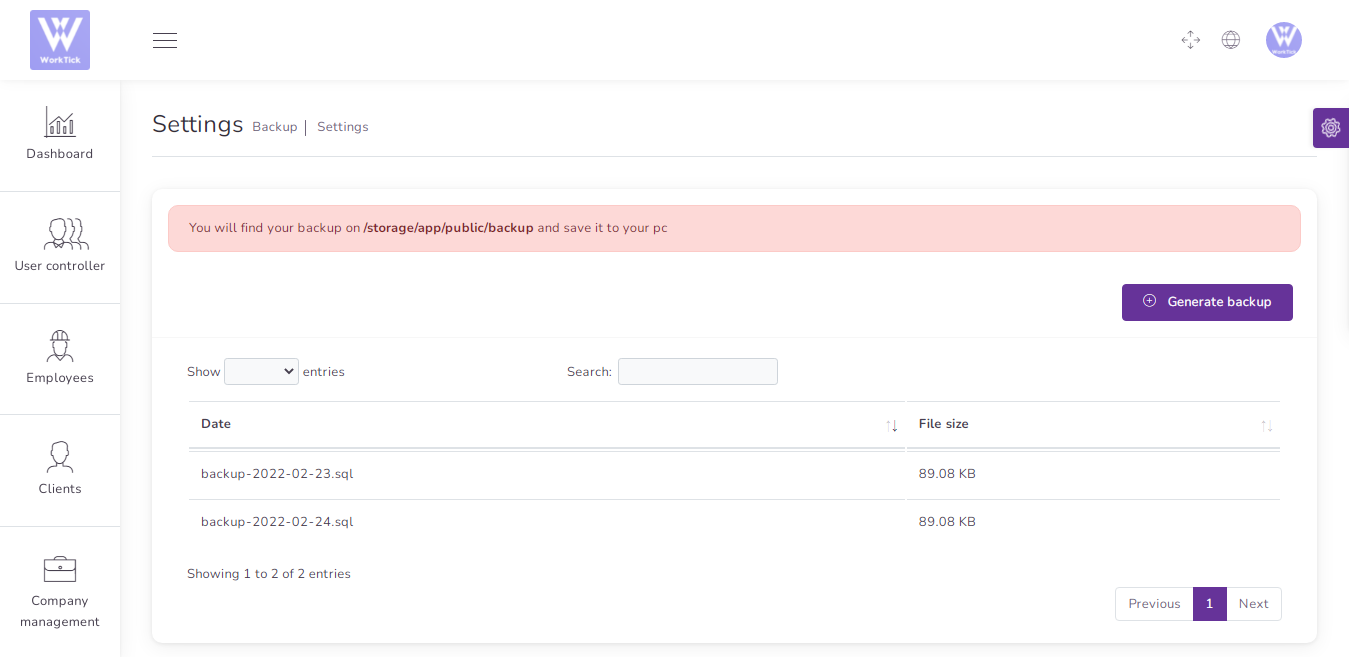
Backup
Click in Generate backup , You will find your backup on /storage/app/public/backup and save it to your pc
Reports
Attendance Report
Employee Report
Project Report
Task Report
Expense Report
Deposit Report
Ratings & review
If you like our item you can rete it . If you don’t know how to provide ratings & review please visit this link: https://help.market.envato.com/hc/en-us/articles/203269490-Giving-Feedback-On-Items Thank you